The Platform presents hierarchical areas in which you can create, configure, and work with all of the elements of your Authorization Policies. As you begin to work with the Platform, you will quickly notice the main Environments and Workspaces in which you can manage your Identities, Policies, Assets, Applications, and more.
About the Main Display
The Platform's Navigation Bar contains:

- Home button (PlainID logo)
- Manage, which leads to the relevant Environment Dashboard.
- Settings icon, which opens the Tenant Settings screen
In addition to:
- Tenant name. When clicked, users have the option to log out.
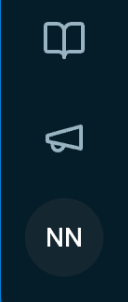
- Product Updates icon to view recent notifications including release notes and feature focus posts.
Tenant Level
At the Tenant level, you can configure:
- Tenant IDP Settings
- API Credentials
- Hybrid Agent Key Settings
- Policy Authorization Agents (PAAs)
- Policy Information Points (PIP)
For more information, see About Tenants.
Environment Level
Within the Tenant are the Environments created and customized by the Organization.
Pages you can access on the Environment level:
- Environment Dashboard
- Admin Audit Reports
- Authorization Audit Reports
- Settings for the Environment
For more information, see About Environments.

Workspace Level
Environments contain Workspaces where you create and manage Identities, Policies, and more.
Note: Viewing Environments and Workspaces is subject to Permissions configured by the System Administrator. For more information, see: Configuring Settings and Permissions.
The following Workspace types exist in the Platform, including:
Workspace Icons
Workspace icons include:
| Icon | Details |
|---|---|
 |
Opens a Search input |
 |
Adds a Workspace |
 |
Opens the Settings screen for the Workspace. |