Dynamic Groups offer a powerful way to manage Identities dynamically according to group definitions. This means that you create a Policy that defines whatever access permissions you want applied to your organization's assets. Instead of managing these permissions according to individual users, you can create and apply Policies to Dynamic Groups.
The advantage of this method is that the Authorization Platform can then determine dynamically which users belong in the group and apply these Policies you have set based on the Attributes you have assigned. And, when Attributes associated with a user are changed, any users that no longer have the Attribute (or value of the Attribute) specified in a Policy associated with a Dynamic Group are automatically removed from the group and therefore will not be part of any Identities definitions for that Policy.
For example, you may want to apply a Policy that enables branch managers in a specific region or country to have access during a time when most branch managers globally are restricted from accessing an organization's Assets. The Policy specifies that all those in the BranchManager Dynamic Group will be granted access based on a Policy that specifies that Dynamic Group=BranchManager is granted access to Asset=AccountServer123 based on the defined Date&Time condition.
The Identities in a Dynamic Group of Branch Managers might be defined by the Attribute Title where title=Manager. If several Branch Managers are promoted to Regional Managers within the organization, no changes in the Policy definitions or associated Identities are required. Dynamically, in real-time, the Policy will no longer be applied to these Identities because they no longer have the Attribute of title=Manager.
When your Environment has more than one Identities Workspaces, each Dynamic Group is unique to the Workspace in which it is created. Dynamic Groups are not shared between Workspaces.
Creating a New Dynamic Group
You can create a new Dynamic Group in an Identities Workspace. Alternatively, while you are creating a new Policy, you can create a new Dynamic Group on the Who wizard screen (step 2 of the wizard) and then continue creating the Policy as needed. Note that you cannot create a new Dynamic Group until you have created at least one Identity Attribute.
To create a Dynamic Group:
- Click on Identities Workspace.
- The New Dynamic Group screen opens. Click
 .
. - Enter the Name of Dynamic Group as you would like it to appear in the Dynamic Group list.
- Enter a Description (optional).
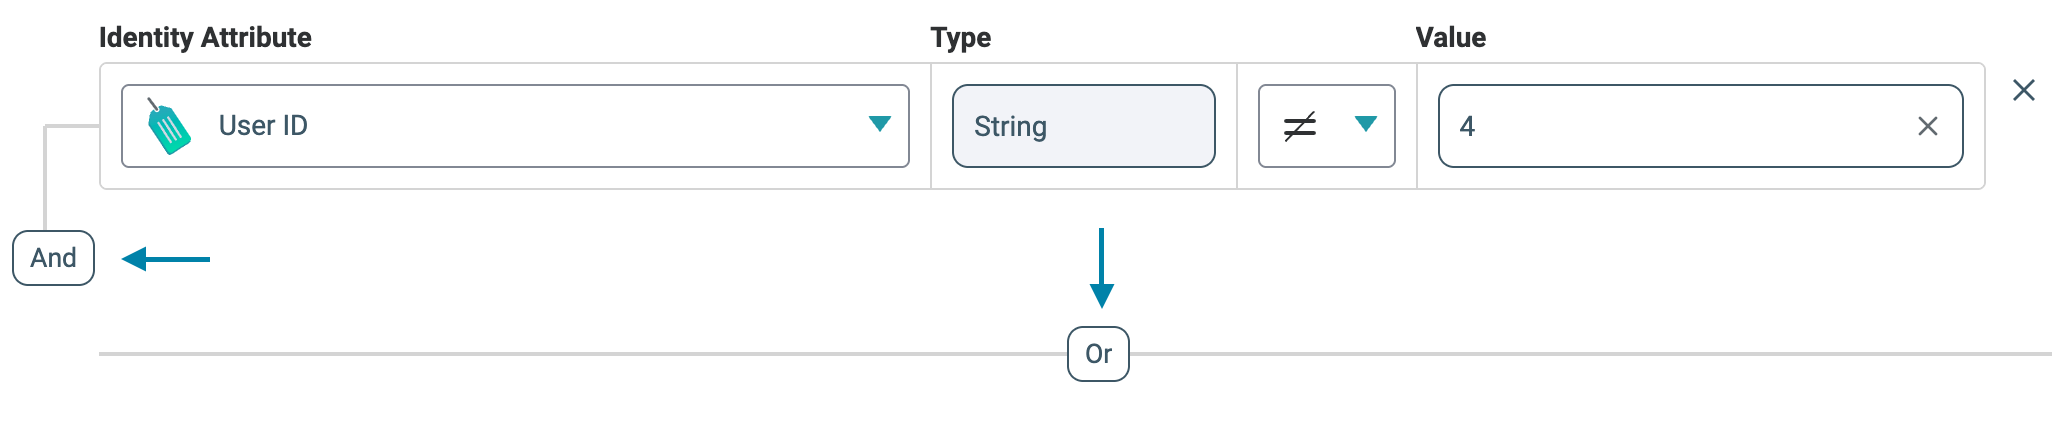
- In the Define Dynamic Group Rules section, select an Identity Attribute that is used as the basis upon which Identities are part of the Dynamic Group. For example, an Attribute like Title could be used. The Type field will reflect the type of Attribute based on what was set when the Attribute was created.
- Select an Operator that determines how the Identity Attribute is related to the Value field. Depending on the Attribute you select, Operator options can include Equals,Not Equals, Contains, Starts with, Ends with, In and Not In.
- In the Value field, specify the value for this Dynamic Group. For example, if you wanted to create a Dynamic Group for all employees in a bank, you could use an Attribute Branch Number, and then in the Value field, supply the Branch Number.
- To add an additional Rule, click And or Or and enter additional Attributes and Values.
- Click Create. Dynamic Group Settings screen is displayed, showing you the details of the new group.
When you return to the Identities Workspace view, you will see that the new group has been added to the Dynamic Groups list. Note that Dynamic Groups can also be created while creating a Policy with the Policy Wizard.
Users can also view a list of Policies associated with the Dynamic Group.
To view the list:
- Select an Identities Workspace
- Select a Dynamic Group.
- Click on the Policies tab.
- A page labelled Policies Using this Dynamic Group opens. Here you can view and manage Policies connected to this Dynamic Group.
Editing a Dynamic Group
- Select the relevant Identities Workspace.
- Click on the Dynamic Group you wish to edit. The Dynamic Group's Settings screen is displayed.
- Click Edit. All fields become editable.
- After modifying the group as needed, click Save.
Deleting a Dynamic Group
- Select the relevant Identities Workspace.
- Click on the Dynamic Group you wish to delete. The Dynamic Group's Settings page is displayed.
- Click Delete Dynamic Group. A warning message appears.
- Click Delete to permanently delete the group.
Viewing Dynamic Groups in Full View
If your organization has many Dynamic Groups defined in the Platform, it is possible that not all of them will be visible. The full list of Dynamic Groups can be viewed by clicking the Show Dynamic Groups Full View link, located at the bottom of the Identities Workspace.
This opens the Dynamic Groups List screen, enabling you to use the Search field to find a specific Dynamic Group. The Full View list contains the following columns:
- Name: Use the up/down arrows to sort the list in alphabetical order according to the name of the Dynamic Group.
- Description: Displays the description of the Dynamic Group (if defined).