Accessing the Simulator
SaaS Access
Visit simulator.operations-ext.plainid.cloud/app
Policy Simulator Local PAA Installation
To install the Simulator locally on your PAA, contact PlainID support at support@plainid.com.
Running the Simulator
Prerequisites
Before using the Policy Simulator, Runtime authentication parameters are required.
To authenticate:
- On the top right, click on the Settings icon.

- Input your base URL. See Authorization APIs for more information.
- Input the Client ID and Client Secret of your Scope.
- Click Save.
Basic Configuration
-
In the left pane, choose a Response Type.
To investigate Identities, choose Asset Resolution, Policy Resolution, or Policy List.
To investigate Assets, choose Policy List or User List.- Asset Resolution:
- Provides a list of allowed assets and actions for a specific Identity.
- Policy Resolution:
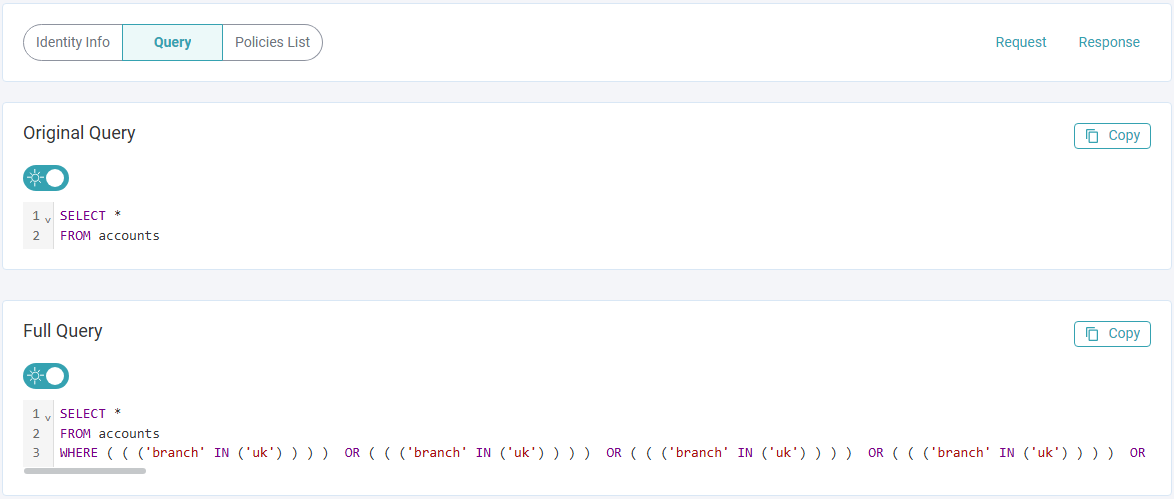
- Returns logical filtering of data permitted for the Identity and enables SQL query simulation by specifying the fully qualified table name.
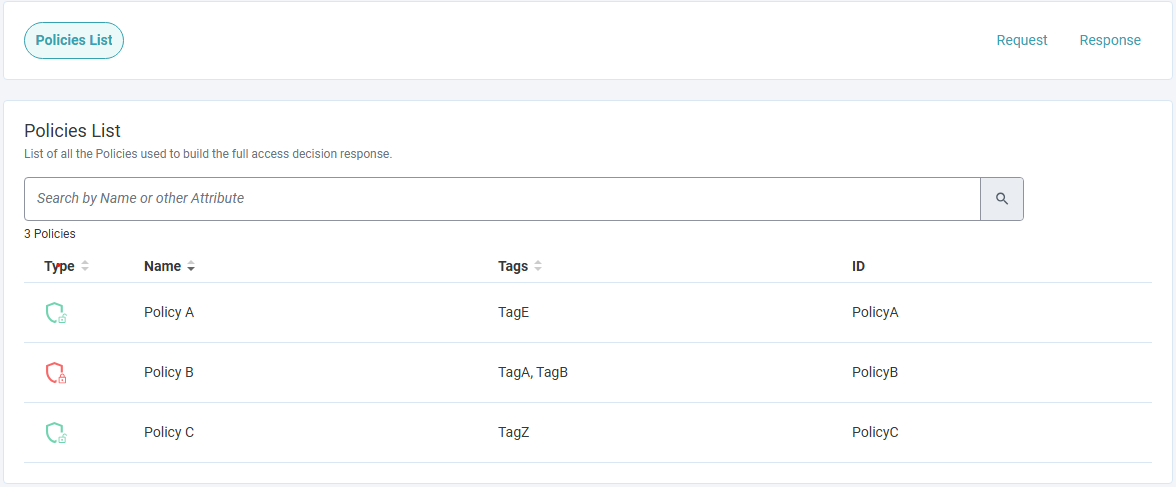
- Policy List
- Returns the relevant policies based on Identities or Assets with their metadata.
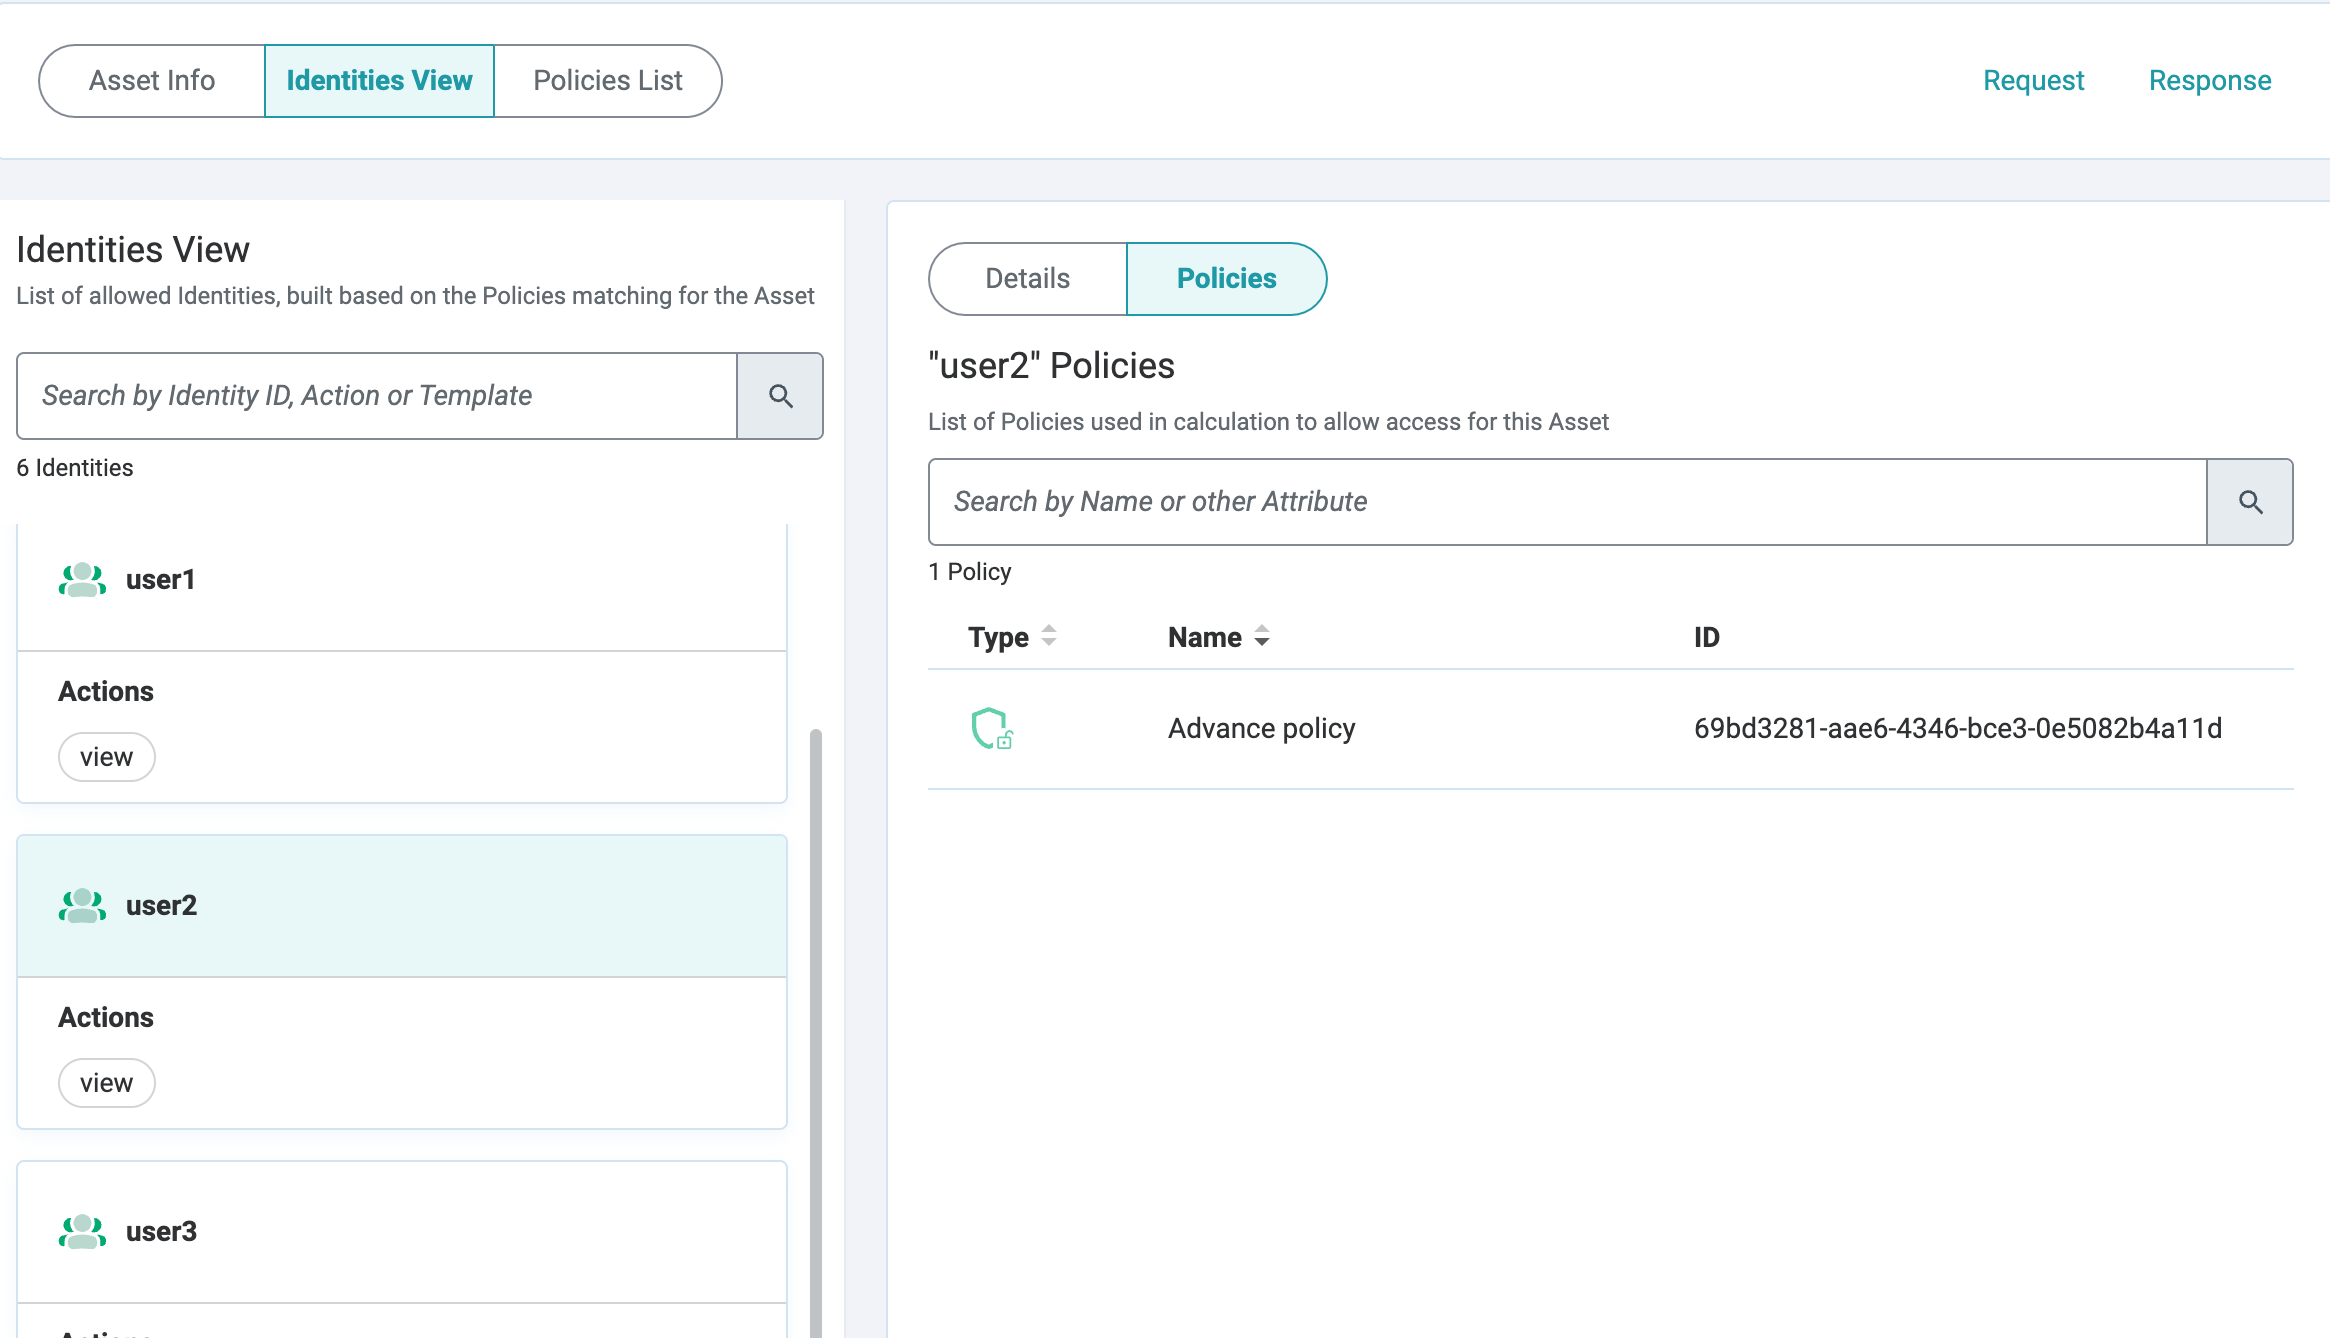
- User List
- Returns a list of allowed Identities with their associated Actions for a specific Asset.
- Asset Resolution:
-
Fill out the input fields.
- Object Type (Available only for Policy List): Allows users to choose whether to investigate Policies based on either Identities (relevant for or all response types) or Assets (Policy List and User List).
-
To investigate Identities, fill out the following input fields:
- JWT: Allows users to get Identity information from JWT. Users can also use the JWT to specify their Identity Template.
- This field is required if the UID is not specified.
- UID: The Identity's unique Identifier
- This field is required if the JWT is not specified.
- Identity Template ID: Specifies the Identity Template the Identity is connected to. This is required when there are multiple Identity Templates within your Environment.
- JWT: Allows users to get Identity information from JWT. Users can also use the JWT to specify their Identity Template.
-
To investigate Assets or Identities (User List) fill out the following input fields:
- Asset ID: The Asset's unique identifier.
- Asset Template ID: Specifies the Asset the Asset Template is connected to.
- The Actions field and Asset Attributes section are optional.
-
Fully Qualified Table Name (Available only for Policy Resolution): Enables users to visualize how the original SQL query is modified based on the Access Decision.
-
You can access additional information by filling out the fields in the Advanced dropdown.
-
Note: You can provide both a JWT and a UID, or at least one of them must be specified.
4. Click on Run Report.
Advanced Configuration
Additional parameter input options (applicable to certain endpoints):
| Parameter | Description |
|---|---|
| Identity Context | Pass Identity context data for the request. |
| Identity Attributes | Add Identity Attributes to support dynamic group calculation or Attribute-based conditions. |
| Asset Context | Filter access responses based on the Asset Context defined, excluding Policies unrelated to the provided Asset defined during the calculation process. For more information, check out our article on Working with assetContext. |
| Asset Attributes | Allows users to get additional Asset information or ignore values available on the Source to simulate access decisions. |
| Environmental Data | Pass information required for requests, Asset rules, and request Conditions. |
| Time Zone and Date and Time | Provide timestamp definition for request calculations. |
| IP | Pass the IP in the request for IP-based condition calculation. |
Reviewing Authorization Responses
When you send an Authorization Request with the relevant objects, you can see a detailed response. The response provides a comprehensive view of how these endpoints work in the context of Identity and Asset investigation.
In the Policy Simulator, after running a report successfully, you view:
- The Authorization request sent to the PDP, which can be useful for custom code or testing with Postman.
- The JSON response as calculated by the PDP.
- A Policies List containing the Name of the Policy, the type, and the Policy ID.
- Policy Custom Attributes that are available for the PDP in the response.
Additionally, users can view more specific information regarding Identities:
- Asset Resolution
- List of Assets permitted to the Identity and their associated Actions.
- The exact Policy granting the Identity access to specific Asset and Action combinations.

- User List
List of Identities and their associated Actions.
- Policy Resolution
- Original and Modified Queries (if the Fully Qualified Table Name is sent in the request).