Policy Custom Attributes enhance management processes and improve visibility by allowing you to tailor metadata to your specific needs, leveraging the generic custom Attributes for greater flexibility. This feature enables users to define custom Attributes at the Environment level, supporting a more adaptive Policy experience. These Attributes are configured at the Environment level and are reflected in the UI, PDP, and Policy Code.
Managing Policy Custom Attributes
Creating Policy Custom Attributes
To manage additional metadata for your Policy (optional), you first need to configure custom Attributes. You can create, update, or delete these Attributes directly from the Environment Settings. Custom Attributes can be managed both before and after a Policy is created, offering flexibility in their implementation.
To create and manage Policy Custom Attributes:
- Select an Environment from the Environment dropdown.
- Click on Environment Settings.
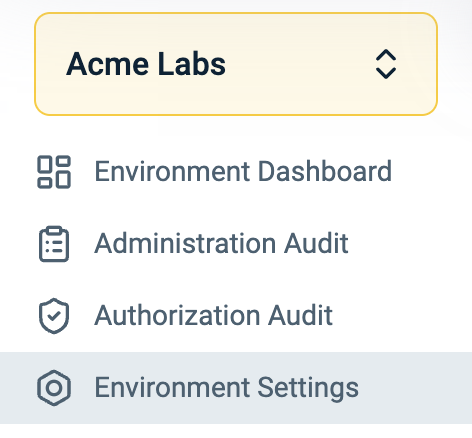
- In the Environment Settings screen, select Policy Custom Attributes.
- Click New Attribute.
- Input a Display Name. This is the name that appears in Policy Details.
- Input a Policy Custom Attribute ID. This ID is used in Policy Code and PDP.
- Specify the Attribute Type (String or Numeric).
- Enable or disable the Value List toggle. If enabled, the Attribute can be selected from a predefined list. If disabled, it allows free-text input.
- Define whether the Attribute is Required.
- Set a Default Value.
- Specify whether the Attribute can be updated.
- Set Attribute as Singular or Multi Value.
- Define the Maximum length (strings) or Maximum Value (numeric attributes).
- Enable or disable the Attribute for the PDP to determine if it is included in evaluation responses.
- Select whether the Attribute should be used locally or globally. Refer to Local and Global Attributes for more information.
- Click Create to finalize the configuration.
Policy Custom Attribute Display Order
After creating Policy Custom Attributes, you can drag and drop Attributes to customize their order in the list to control the Attribute display order.
Local and Global Attributes
Local and Global Attributes determine how Import Policies behave when utilizing Management APIs.
- Local: Scoped to the current Environment. All Attribute values are applied during Rego evaluation within that Environment.
- Global: Shared across all Environments. Policies reference the evaluated values consistently across multiple Environments.
For additional details, see Structured Rego.
Editing Policy Custom Attributes
To ensure that your edits take effect in the Policy, the Policy itself needs to be edited and saved after saving the Policy Custom Attribute changes.
To edit a Policy Custom Attribute:
- Select an Environment from the Environment dropdown.
- Click on Environment Settings.
- In the Environment Settings screen, select Policy Custom Attributes.
- Click Edit.
- Modify the relevant fields.
- Click Save.
Deleting Policy Custom Attributes
Once a Policy Custom Attribute is deleted, the Attribute value is removed from all Policies.
To delete a Policy Custom Attribute:
- Select an Environment from the Environment dropdown.
- Click on Environment Settings.
- In the Environment Settings screen, select Policy Custom Attributes.
- Hover over the Policy Custom Attribute you wish to delete.
- Click the trash icon.
- A warning message appears. Click Delete to confirm.
These Attributes are configured at the Environment level and are reflected in the UI, Policy Code, and PDP.
Policy Authoring
As part of the Policy Authoring experience, you can manage Custom Attributes (metadata) from the UI under the Policy Details section or the Policy Code in the customAttributes section, which contains the Attribute names and their defined values.
Enriching the PDP
When Attributes have been enabled for use in the PDP appear in the UI, they can be included in the PDP response by enabling includeAccessPolicy parameter in the code as well. This allows for the inclusion of permission metadata in the PDP response, providing insights into the applied Policies. Custom Attributes are also displayed in the Structured Rego Policy metadata section.
See the relevant API for more information on permission metadata in the response.
Preset Custom Attributes
Preset Custom Attributes include Attributes that extend Policy metadata with additional governance and compliance context. These Attributes help standardize how Policies are classified and reviewed, without affecting enforcement behavior. These Attributes are managed per Policy and are intended for governance, visibility, and reporting purposes only. They do not impact Policy evaluation or runtime enforcement.
The following Attributes are automatically added to both new and existing Environments. No manual setup or migration is required:
- Regulatory Tags – Used to associate Policies with regulatory or compliance domains (for example, GDPR or HIPAA).
- Policy Score – Used to represent an internal classification or assessment of a Policy based on tenant-defined criteria.
Note: These Attributes cannot be deleted. You can, however, modify their order. PlainID provides a list of values that can be modified.
Some Attributes, such as Regulatory Tags, may be populated automatically when AI features are enabled. When AI is not enabled, all attributes remain fully available for manual use and editing. To enable AI capabilities, refer to AI Platform Capabilities.
For more information, refer to Policy Metadata.