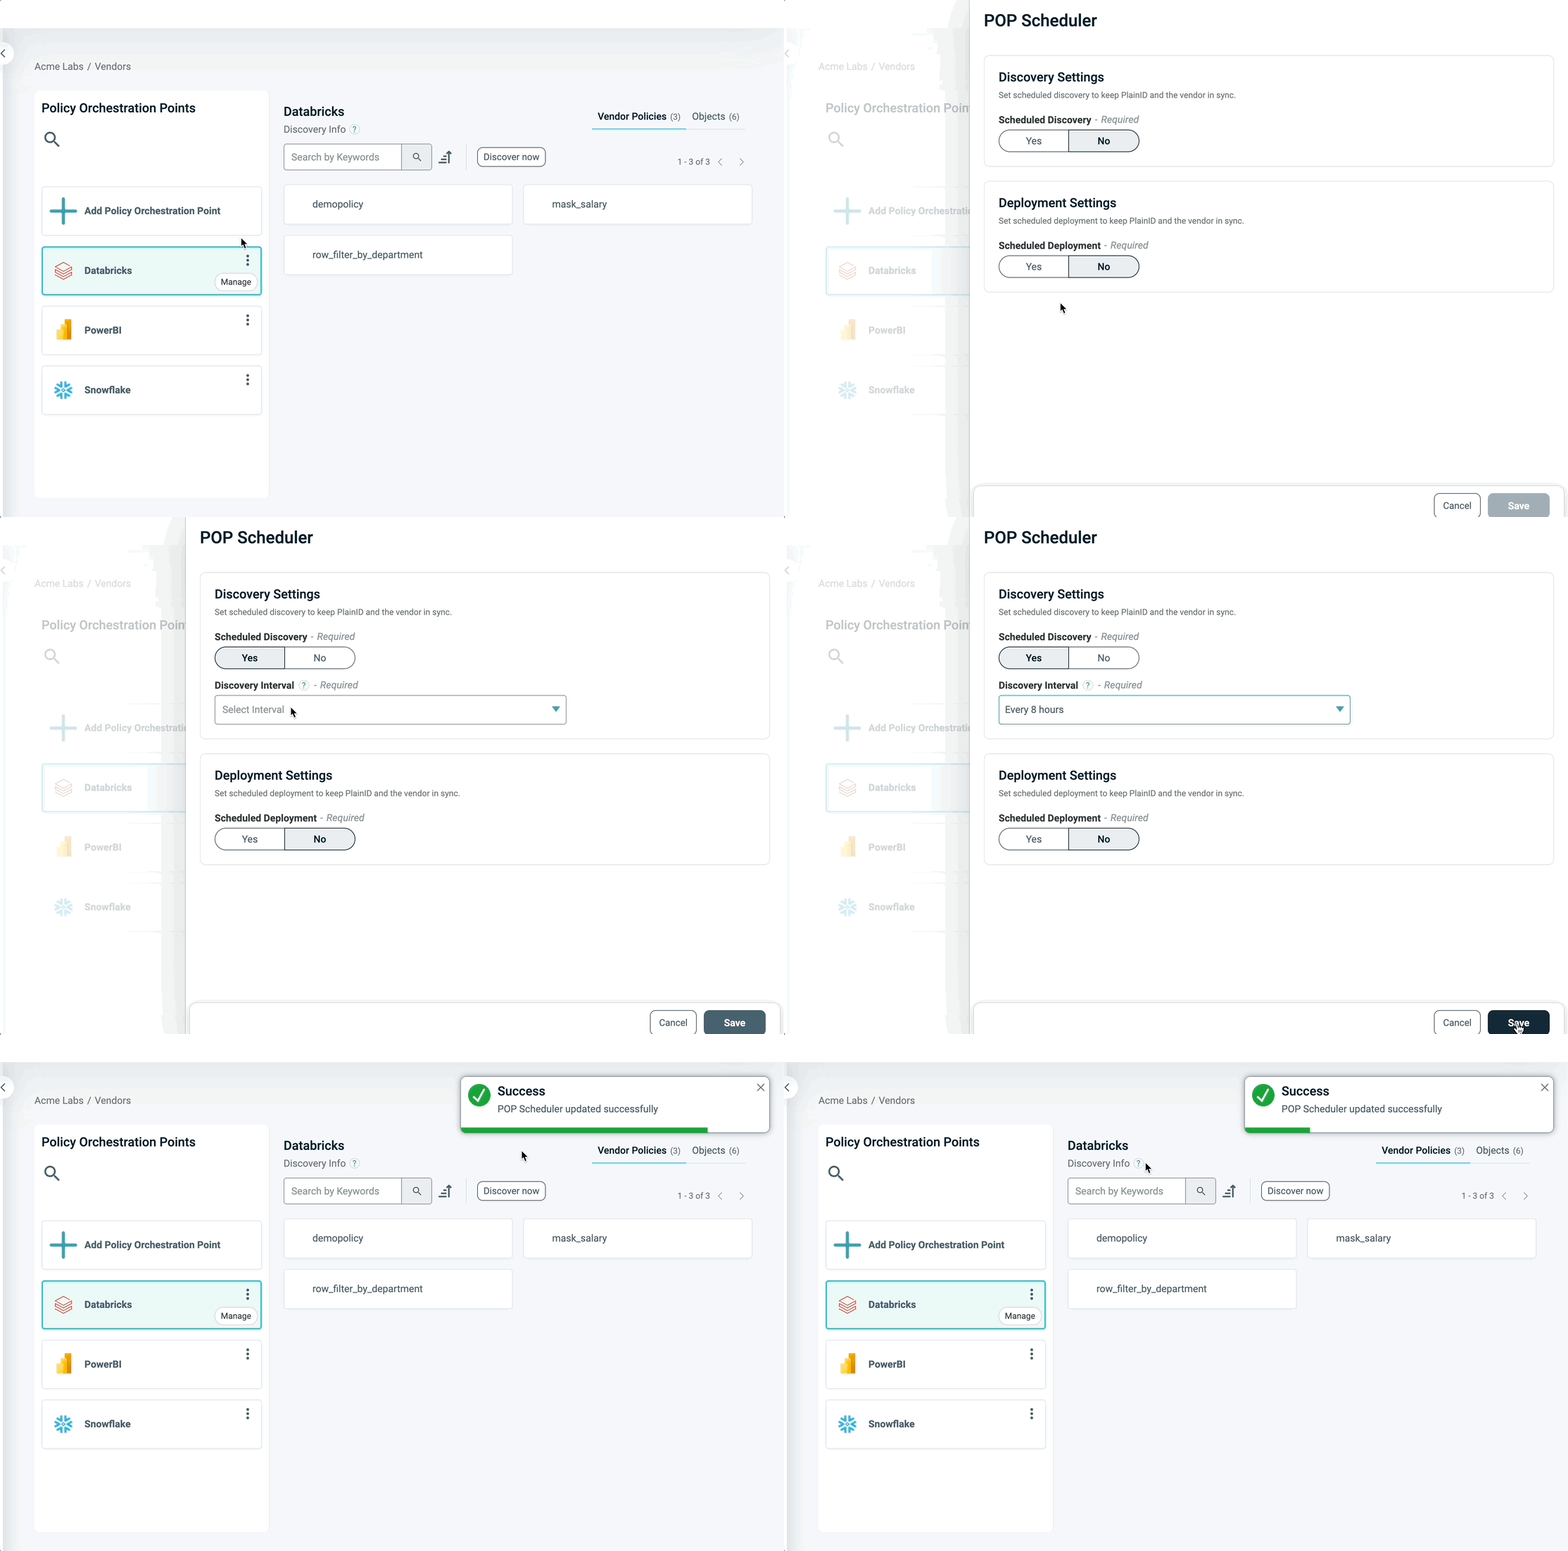
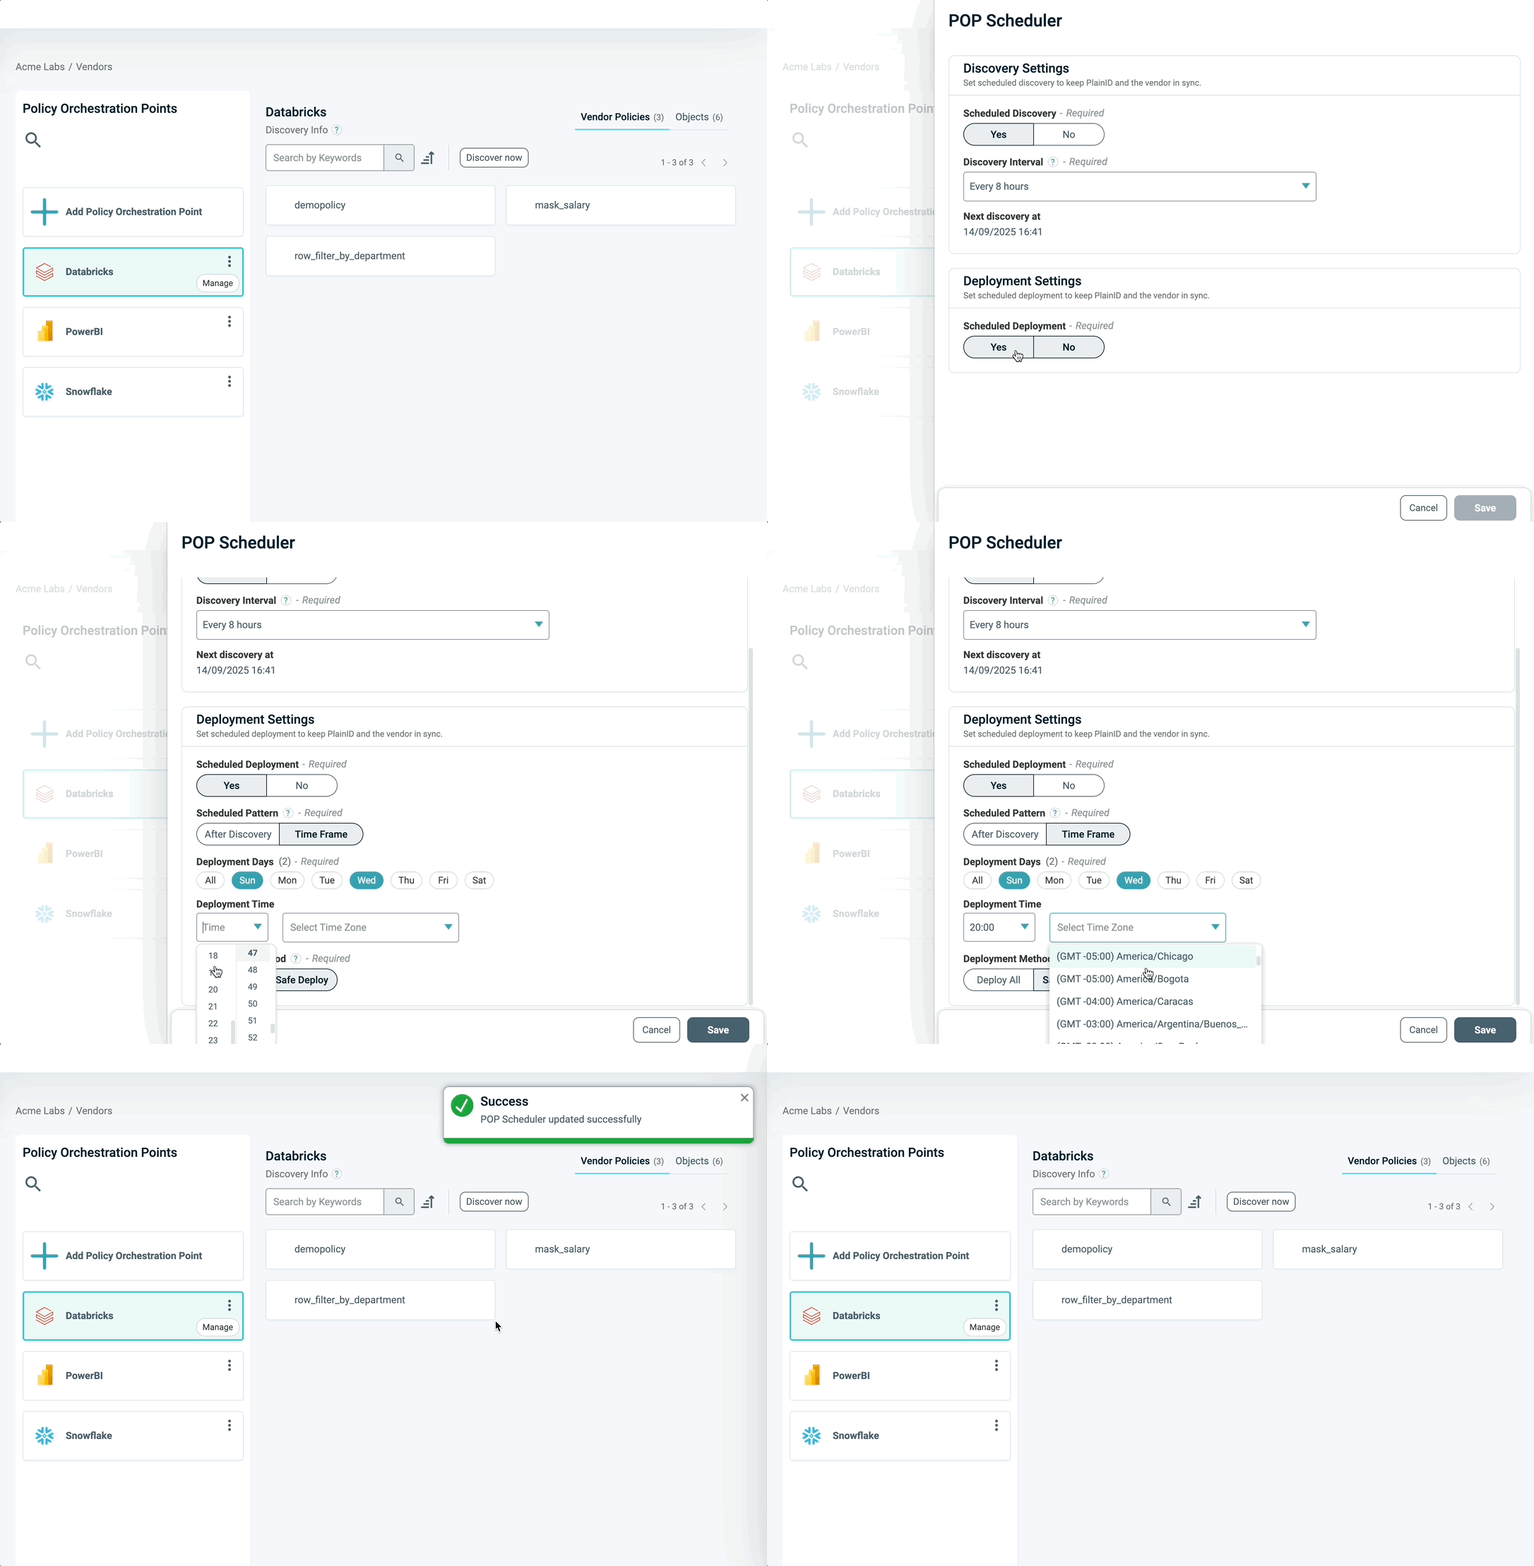
The POP Management Scheduler helps maintain synchronization between PlainID and connected vendor systems by automating Discovery and Deployment operations. It ensures continuous visibility and policy consistency with minimal manual effort.
Scheduled Discovery keeps PlainID in sync with the vendor platform, reduces the need for manual discovery, and ensures ongoing visibility and up-to-date information in the Authorization Workspace.
Scheduled Deployment ensures that approved policies are consistently pushed to the vendor ensuring continuous alignment and reducing the need for manual intervention.
Before enabling Scheduled Discovery or Deployment, ensure that you have already set up an Orchestration Workspace and a POP. If you do not have either, refer to Creating a New Workspace and Managing POPs.
Scheduled Discovery
Scheduled Discovery automatically retrieves the current state of your vendor system at predefined regular intervals, which includes Policies and related objects.
Intervals
When Scheduled Discovery is enabled, a Discovery operation runs automatically at a predefined interval (e.g., every 1, 2, 4, 6, up to 24 hours). To improve overall system performance and prevent activity spikes
- The first Discovery will run randomly within your predefined time interval.
- Future Discoveries will continue to run at your defined interval, relative to the time of the first run with an additional time range of up to 10 minutes.
- To provide full visibility into scheduling, the exact Scheduled Discovery time is displayed in both the POP Scheduler panel and the Orchestration Workspace.
- Manual Discovery remains available at any time in the UI and through our APIs and does not interfere with the scheduled process.
Enabling Scheduled Discovery
To enable Scheduled Discovery:
1.In the PlainID Platform, open your Orchestration Workspace located in the Environment side panel.
2. Click the three dots on the POP card for which you want to schedule Discovery.
3. Select Scheduler.
4. A panel labeled POP Scheduler opens. In the Discovery Settings section enable Scheduled Discovery.
5. In the Discovery Interval dropdown, select the desired interval time.
6. Click Save or continue setting up Scheduled Deployment in the Deployment Settings.

Scheduled Deployment
Scheduled Deployment is available when a POP is operating in Manage Mode. It automatically pushes approved policies from PlainID to the vendor system based on your configuration. Scheduled Deployment maintains alignment between PlainID and vendor policy configurations, ensures that policy updates are consistently and automatically applied, and reduces the risk of errors during deployments.
Scheduled Deployment only occurs if a change from either PlainID or the vendor is detected.
Note: When the Scheduled Deployment is enabled, it may cause a minor delay in the next scheduled Discovery run.
Enabling Scheduled Deployment
To enable Scheduled Deployment:
1.In the PlainID Platform, open your Orchestration Workspace located in the Environment side panel.
3. Click the three dots on the POP card for which you want to schedule deployment.
4. Select Schedule.
5. A panel labeled POP Scheduler opens. In the Deployment Settings section enable Scheduled Deployment.
6. Select whether you would like the scheduled deployment to occur After Discovery or within a specific Time Frame.
-
After Discovery: Deployment is triggered immediately after each scheduled Discovery. Note: Ensure that Scheduled Discovery is enabled for this option to take effect.
-
Time Frame: Deployment runs during the specific days and hours you define.
- If Time Frame is selected, a Deployment Interval section appears. Select the desired day(s) and time(s) for the deployment.
- Choose a deployment method:
-
Deploy All: Deploys all Policies from PlainID to the vendor, including create, update, and delete operations. Policies flagged with Vendor Changes Detected are also overwritten.
-
Safe Deploy: Deploys Policies from PlainID to the vendor only, but excludes those flagged with Vendor Changes Detected. The flagged Policies remain unchanged and continue to display their flags for manual review and action.
- Deployment only occurs if a change from either PlainID is detected.
Note: For Zscaler, only the “Deploy All” method is supported.
- Click Save.

Scheduled Discovery and Deployment streamline the ongoing synchronization between PlainID and your vendor systems. By automating these processes, you ensure continuous visibility, reduce manual effort, and maintain consistent Policy alignment, while improving system performance through optimized scheduling.