In this guide users can learn about Scope Authentication methods like Request Secret, Secret Header, and Authorization JWT, how to set them up, and validate them.
Authentication to Runtime
It is important to authenticate Runtime requests to safeguard PlainID Authorization service security and ensure the authenticity of requesting Applications or services seeking sensitive user authorization rights. This section details steps users need to perform to configure Application authentication at the Scope level and implement security measures like the Authorization JWT.
Setting up an Authentication Method in the Scope
Customers are required to set up their integrating Application's Authentication method (Auth Method) at the Scope level, determining how it authenticates to the PDP (Runtime service). Users are still required to send their Client ID in the request body (using the clientId property) or request header (using x-client-id header) for identification purposes. See Managing Scopes to learn more about how to create, manage, and delete Scopes.
Users can choose from the available authentication methods for the relevant Scopes:
| Authentication Method | Description |
|---|---|
| Request Secret | Request Secrets can be generated for each Scope and then sent as a means of Authentication in the request body. |
| Secret Header | Headers in an HTTP request are used to convey additional information about the request. This can include Authentication details. In this case, a Scope secret can be included in the request headers to authenticate the client making the request. |
| Authorization JWT | If an Application wants to authenticate using a Token instead of a secret, it can send an Authorization JWT as a means of authentication. Ensure that your Authorization JWT is valid for a successful authentication process if you are using it instead of a Secret as an Authentication method. |
A best practice when using the Authorization JWT is to send an Application Service Access Token. An Identity Token can be sent separately as a different JWT used for other purposes like fetching Identity data. In this case, the Authentication for the Runtime through the service or Application can be sent through one JWT in the header, and any Identity information can be sent through an Identity Token JWT.
However, it is still possible to combine the JWTs and use an Identity Token to authenticate to the Runtime.
Error Handling: Using an incorrect secret or an invalid JWT for request authentication results in an error.
Existing Scopes will not have any Authentication Method defined by default. Their behavior is not expected to change.
We advise our customers to define an Authentication Method for each of their Scopes and adjust them to their preferred Authentication flow.
The option to have a Scope with an undefined Authentication Method is temporary and will be removed soon.
To set up Authentication Methods in the Scope:
-
Click on Environment Settings under the Environment Dropdown.
-
In the Environment Settings window, click on the Scopes tile.
-
Click on Create Scope or click on an existing one.
-
Under Auth Method, select the relevant Authentication method.
Managing Secrets
Your Applications can use a Secret key to authenticate the Authorization requests sent to the PDP. To use this authentication method, you can manage secret keys for each Scope (ClientID) and send them together with the ClientID in the request body or as a header. Each Scope (ClientID) can have multiple secret keys, which are displayed in a list in the Manage Keys section in the Scope. Existing secret keys are not displayed. To acquire a key, regenerate a key, and copy it. Secret Keys can be deleted.
To set up or manage Client Secrets in the Scope:
- Open your Environment Settings.
- Click on Scopes.
- Set Request Secret or Secret Header as the Scope’s Authentication Method.
- Click Save.
- On the top right, click on Manage Keys.
- In the right side-panel, set up your Scope Client Keys.
- Create a new Key or regenerate a new secret.
- On the bottom, click on Close.
Managing JWT Validation
JWT used for Authentication must be a valid JWT. The validation process consists of validating the JWT signature, expiration, and an additional optional validation of a key-value claim. Users can set up multiple validation setting blocks in the event where different JWKs need to be set up.
To set up or manage JWT Validation for the Authentication Methods in the Scope:
- Open your Environment Settings.
- Click on Scopes.
- Set Authorization JWT as the Scope’s Authentication Method.
- Click Save.
- On the top-right, click on Manage JWT.
- Input a JWKs URL. This URL is exposed by your IDP or other JWT Issuer, which is used to fetch keys for the JWT signature validation.
- Input a Key Refresh Interval (1-24 hours).
- Input a Validation Claim Key and Value (optional). This field can always be updated. This is used as an extra validation step by checking for a Claim Key in your Authorization JWT and matching its value.
- Click Save.
Note: The Validation Claim Key and Value are verified after the JWKs URL and JWT expiration is validated first. Any value can be used as a claim value if you only want to validate the existence of the claim, regardless of its value.
PlainID supports RS256, PS256, and ES256 signature validation.
PDP Responses as JWT
In addition to the standard JSON response format, the PDP can return Policy decision responses as signed JWTs, allowing users to validate the authenticity and integrity of PDP responses using standard JWT verification mechanisms.
To instruct the PDP to generate a signed JWT response, a dedicated parameter must be included in the PDP request. In addition, JWT signing and response settings must be configured in the Scope settings before this capability can be used.
Configuring JWT Signing Settings
Use the JWT Signing Settings section to configure the private key used by the PlainID Policy Decision Point (PDP) to sign JWT responses.
To configure JWT Signing Settings:
-
Open Environment Settings.
-
Click on Scopes.
-
Select an existing Scope or create a new one.
-
Click Edit on the top right.
5 Navigate to the JWT Signing Settings section. -
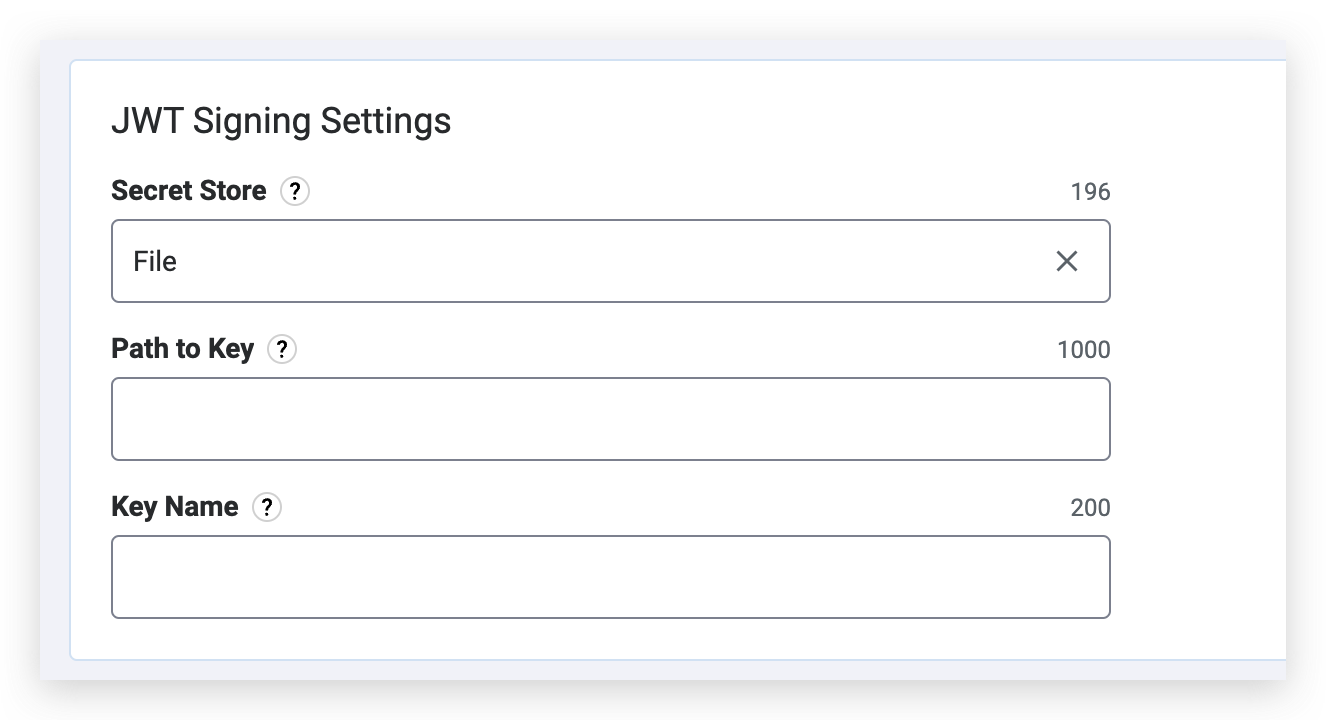
Configure the following fields as needed:
- Secret Store – Enter the ID of the Secret Store to use.
If left empty, the default Secret Store is enabled - Path to Key – Enter the path to the signing key in the vault.
This setting is relevant only for Secret Stores of type Vault.
If not specified, thedetails.defaultPathvalue from the Secret Store configuration is used. - Key Name – Enter the name of the signing key in the vault.
This setting is relevant only for Secret Stores of type Vault.
If left empty, the Scope ClientID is used as the Key Name.
- Secret Store – Enter the ID of the Secret Store to use.
-
Click Save.
Configuring JWT Response Settings
Use the JWT Response Settings section to customize the signed JWT returned by the PlainID Policy Decision Point (PDP).
To configure JWT Response Settings:
-
Open Environment Settings.
-
Click on Scopes.
-
Select an existing Scope or create a new one.
-
Click Edit on the top right.
-
Navigate to the JWT Response Settings section.
-
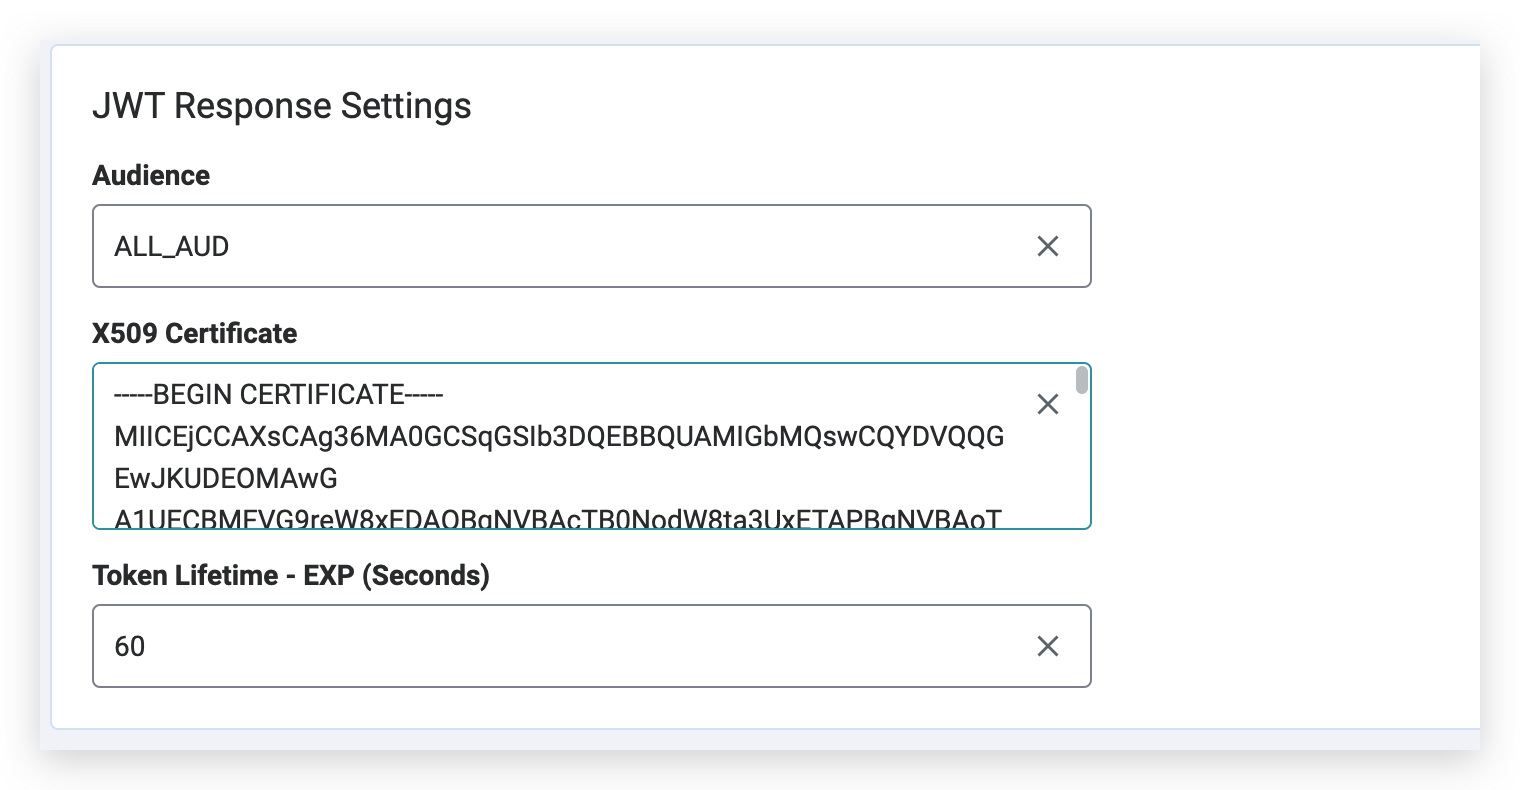
Configure the following fields as needed:
- KeyID – Defines the
kidvalue included in the JWT header.
By default, the Scope ClientID is used as the KeyID value. You can override this behavior by entering a custom KeyID. - Audience – Defines the value included in the JWT
audclaim. - X509 Certificate – Enter the public X.509 certificate that is published in the PDP JWKS URL.
Consumers of the PDP signed JWT use this certificate to validate the JWT signature. - Token Lifetime - EXP (Seconds) – Defines the JWT expiration time in seconds.
The configured value is included in the JWTexpclaim.
- KeyID – Defines the
-
Click Save.
JWT Response Customization
Use the JWT Response Customization section to control how authorization data is embedded in the signed JWT returned by the PlainID Policy Decision Point (PDP).
This section allows you to include authorization details from the PDP decision in a custom JWT claim using a configurable template and delimiter format.
To configure JWT Response Customization:
-
Open Environment Settings.
-
Click on Scopes.
-
Select an existing Scope or create a new one.
-
Click Edit on the top right.
-
Navigate to the JWT Response Customization section.
-
Configure the following fields as needed:
-
Include Incoming IDP JWT Payload:
When enabled, the incoming Identity Provider (IDP) JWT payload is included in the generated PDP JWT response. -
Claim Attribute Name:
Defines the JWT claim name that stores the generated authorization data.
Example:x-pid-authz -
Template:
Defines the format used to generate authorization entries in the JWT claim.
Template variables can reference PDP response attributes such as:{{asset_type}}{{asset_id}}{{action}}
Example template:
{{asset_type}}:{{asset_id}}:{{action}} -
Item Delimiter:
Defines the delimiter used to separate multiple generated authorization entries inside the claim value.
Example delimiters include:- Space
- Comma
- Pipe
-
-
Click Save.