PlainID offers an API Access Authorization Pattern for this third-party vendor. For more information, see API Access Authorization Pattern.
The Amazon API Gateway enables developers to create, publish and monitor RESTful and WebSocket APIs to allow real-time communication between two applications (for example, the Platform and your Organization's application).
Use Example
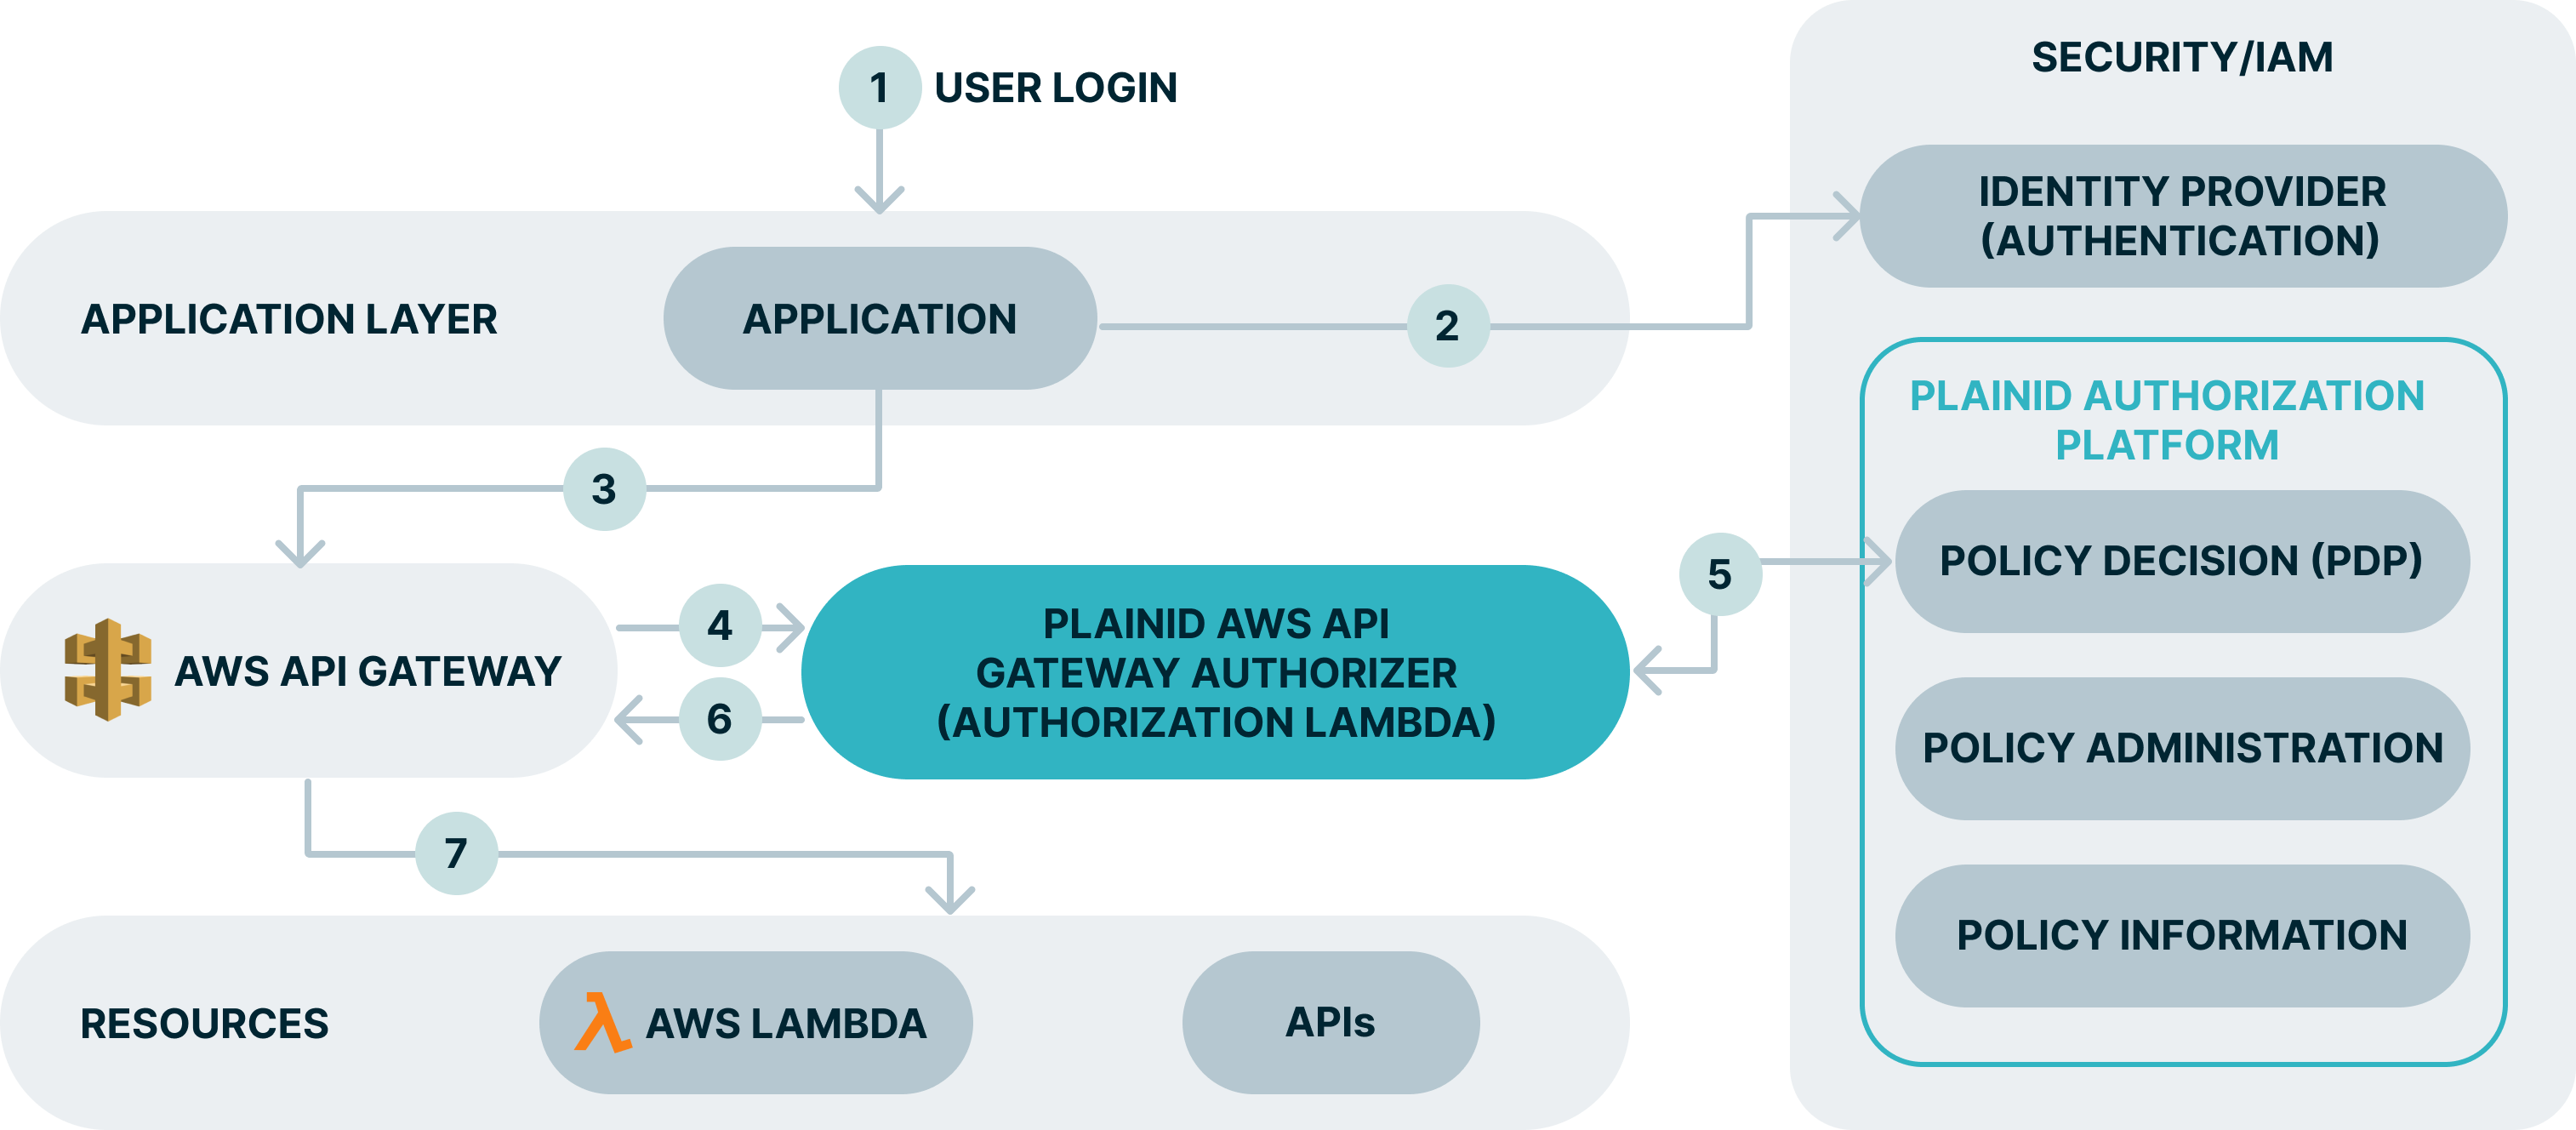
Explanation
- The end user access the app.
- The user is redirected to complete the authentication process on the IDP.
- The app access services/APIs in AWS. The API call is intercepted by the AWS API GW.
- API Gateway calls the PlainID Authorizer (a PlainID-provided Lambda function).
- The PlainID Authorizer requests an access decision from the PlainID PDP which responds with a dynamically calculated access decision based on the policies configured within the PlainID Authorization Platform.
- Access Decisions is enforced at the API Gateway. Request can be denied or permitted as-is.
- The client can access resources such as AWS Lambdas and API resources.