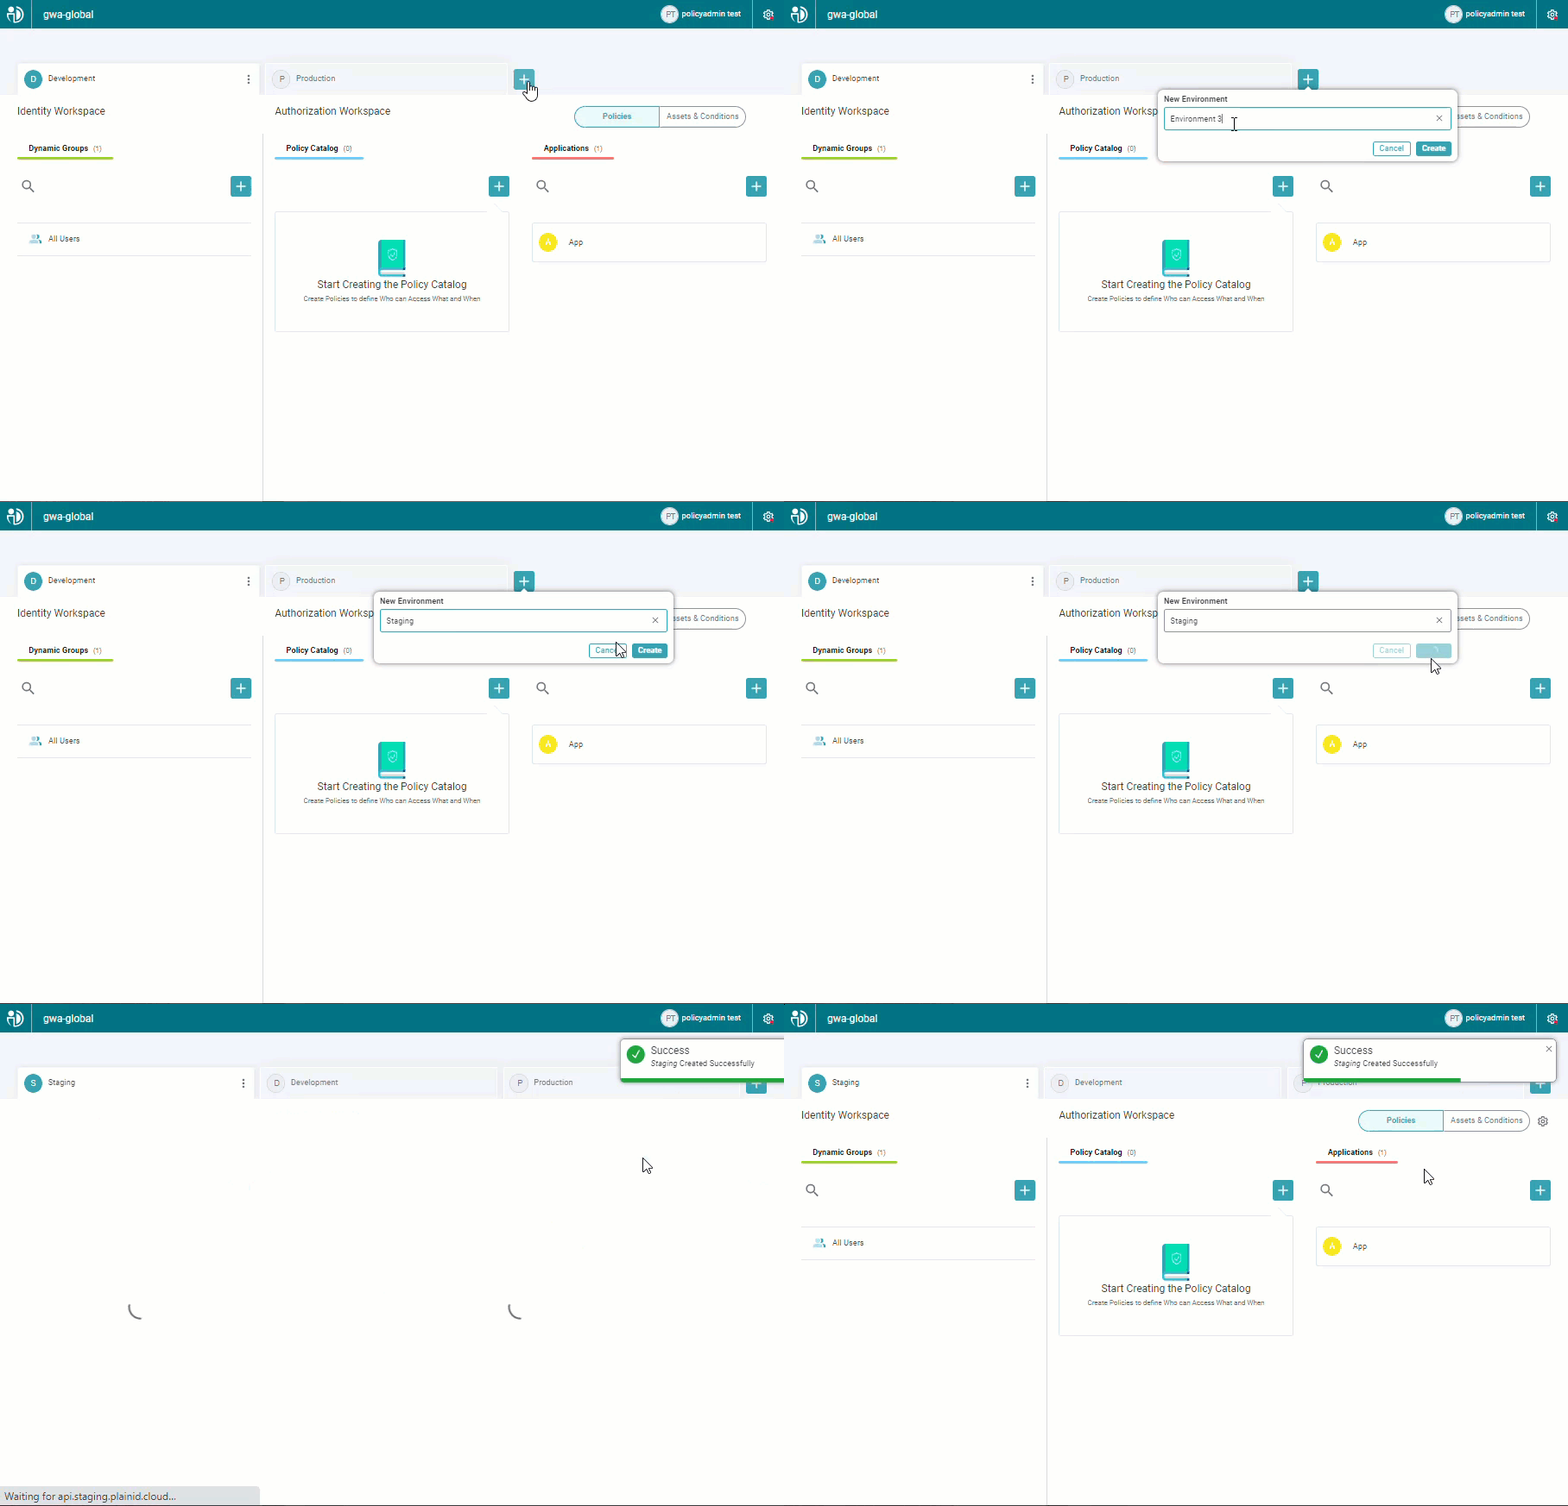
Environments are intended as a way to set a unique collection of objects (Identities, Partners, Policies, etc.) within a workspace. There are numerous reasons why you might want to create an Environment (for example, for stages in the lifecycle of a Policy - Demo, Staging, Production). When you first access the Platform, one Environment is created automatically. You can work within that Environment, change its name, add additional Environments, etc.
To create a new Environment:
- Click the
 icon. The New Environment dialog box opens.
 - Enter a name for the new Environment and click Create. The new Environment is created.
After you create the new Environment, you will need to create the objects and building blocks required to define the Policy.
For more information, see Prerequisites for Building Policies.

Editing an Environment
To edit Environment Settings:
- Click the three vertical dots (
 ) and select Settings.
 - Click Edit. The fields of the currently displayed tab that can be edited become editable.
- After you change a setting value, click Save.
Deleting an Environment
When no longer needed, Environments can be deleted. It is important to note that all objects in the Platform are Environment-centric.
This means that when you delete an Environment, this action will also delete the Workspaces and all objects (Dynamic Groups, Asset Types, Applications, Actions, Scopes, etc.) as well.
Deleting the Environment will not affect information in your Identity and Data Sources, but it will delete the connection between those Sources and the Platform defined in the deleted Environment.
To Delete an Environment:
- Click the three vertical dots (
 ) and select Settings.
 - Click Delete Environment.
- Confirm that you wish to delete the environment and click Delete.