In the Platform, Applications represent the business systems that allow users to interact with an organization’s Assets. Each Application defines how access is managed through Authorization Policies, which specify who can perform certain actions and what those actions are — such as viewing, accessing, or updating Assets.
Applications are created and managed in the Policies Workspace (formerly Authorization Workspace) and are associated with one or more Asset Types, which group related Assets. To view details about an Application, select it from the list to open the Application Details screen, which includes the Details, Asset Types, and API Mappers tabs.
Users can also view a list of Policies associated with the Application by hovering over the Application and clicking on the View Policy List button. This opens a page displaying a list of Policies using this Application.
Creating an Application
To create a new Application:
-
Select the relevant Policies Workspace.
-
Navigate to the Applications section and click New App. The New Application screen is displayed.
-
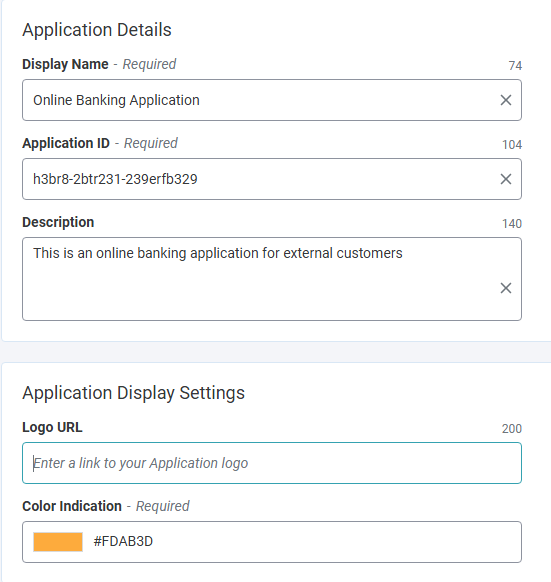
Enter the Display Name of the new Application.
-
In the Application ID field, input an ID that is unique per Environment (required). The Application ID can be used in Management APIs. The maximum number of characters for this field is 128.
- If you selected Auto Generated ID, a GUID is automatically set as the Application ID.
-
Enter the Description of the new Application. This is an optional field where additional information about the application can be provided.
-
In Set Application Display, you can customize how the Application appears, including:
- Entering a URL for your logo in the Logo URL field.
- Making it visually easier to differentiate between the Applications by selecting a color in the Color Indication field.
-
In the Scope field, you have the following options:
Click **Auto created Scope** to automatically create a Scope for this Application.- Click Select Scope from List to select an existing Scope to connect to this Application.
- Click None, if you do not wish to define a Scope at this time.
-
Click Create. The Application is added to the list of Applications.
Editing an Application
To edit an Application:
- Select the relevant Policies Workspace.
- Select the Application to edit. The Settings screen for that Application is displayed.
- The fields on the Details tab become editable. On this screen, you can edit the current values for the Application including the Name, Description, Logo URL and Color Indication of the Application.
- On the Assets tab, you can add, import, or delete an Asset.
- On the API Mappers tab, you can add, edit, delete and change whether an API Mapper is Active on Inactive.
Deleting an Application
Note: If the Application is deleted, Policies that allow users to perform Actions on the deleted Application can no longer be enforced.
To delete an Application:
- Select the relevant Policies Workspace.
- Select the Application to delete. The Settings screen for that Application is displayed.
- Click Delete. A confirmation window opens.
- Click Confirm. The Application is deleted.