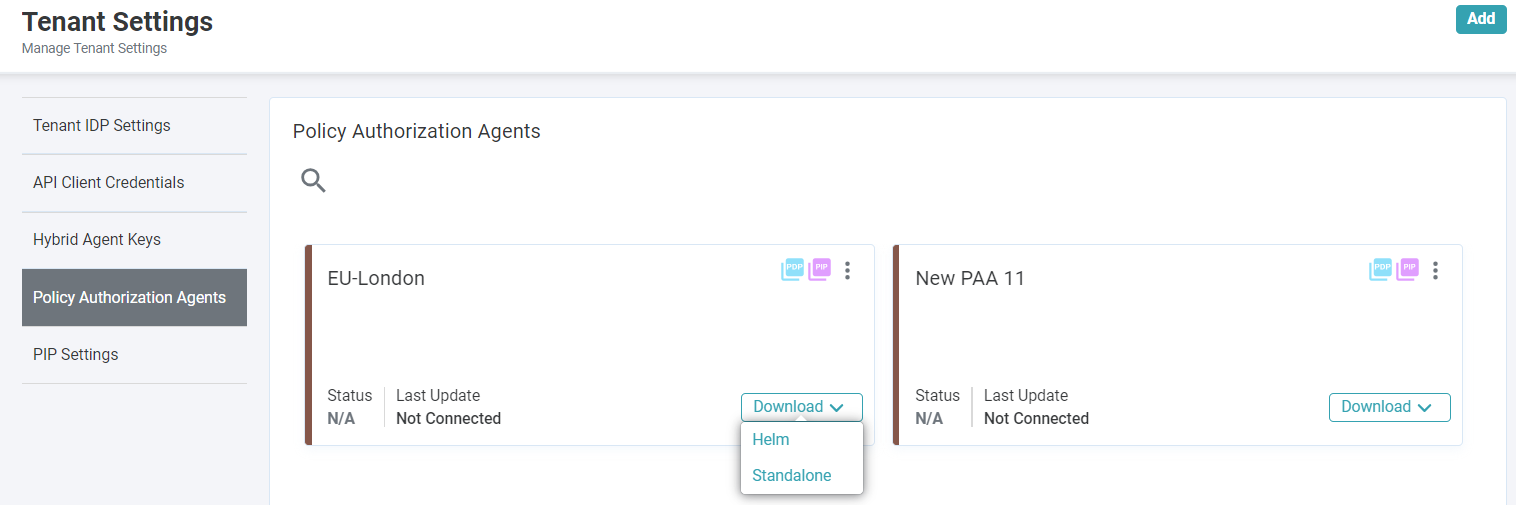
Once you create a PAA (see Managing Policy Authorization Agents), the PAA is listed on the Policy Authorization Agent screen. Each PAA is represented by a Policy Authorization Agent Card.
When an organization is maintaining multiple Environments (for example, Staging and Production), it is recommended that a PAA be configured for each Environment, each with its own connection strings.
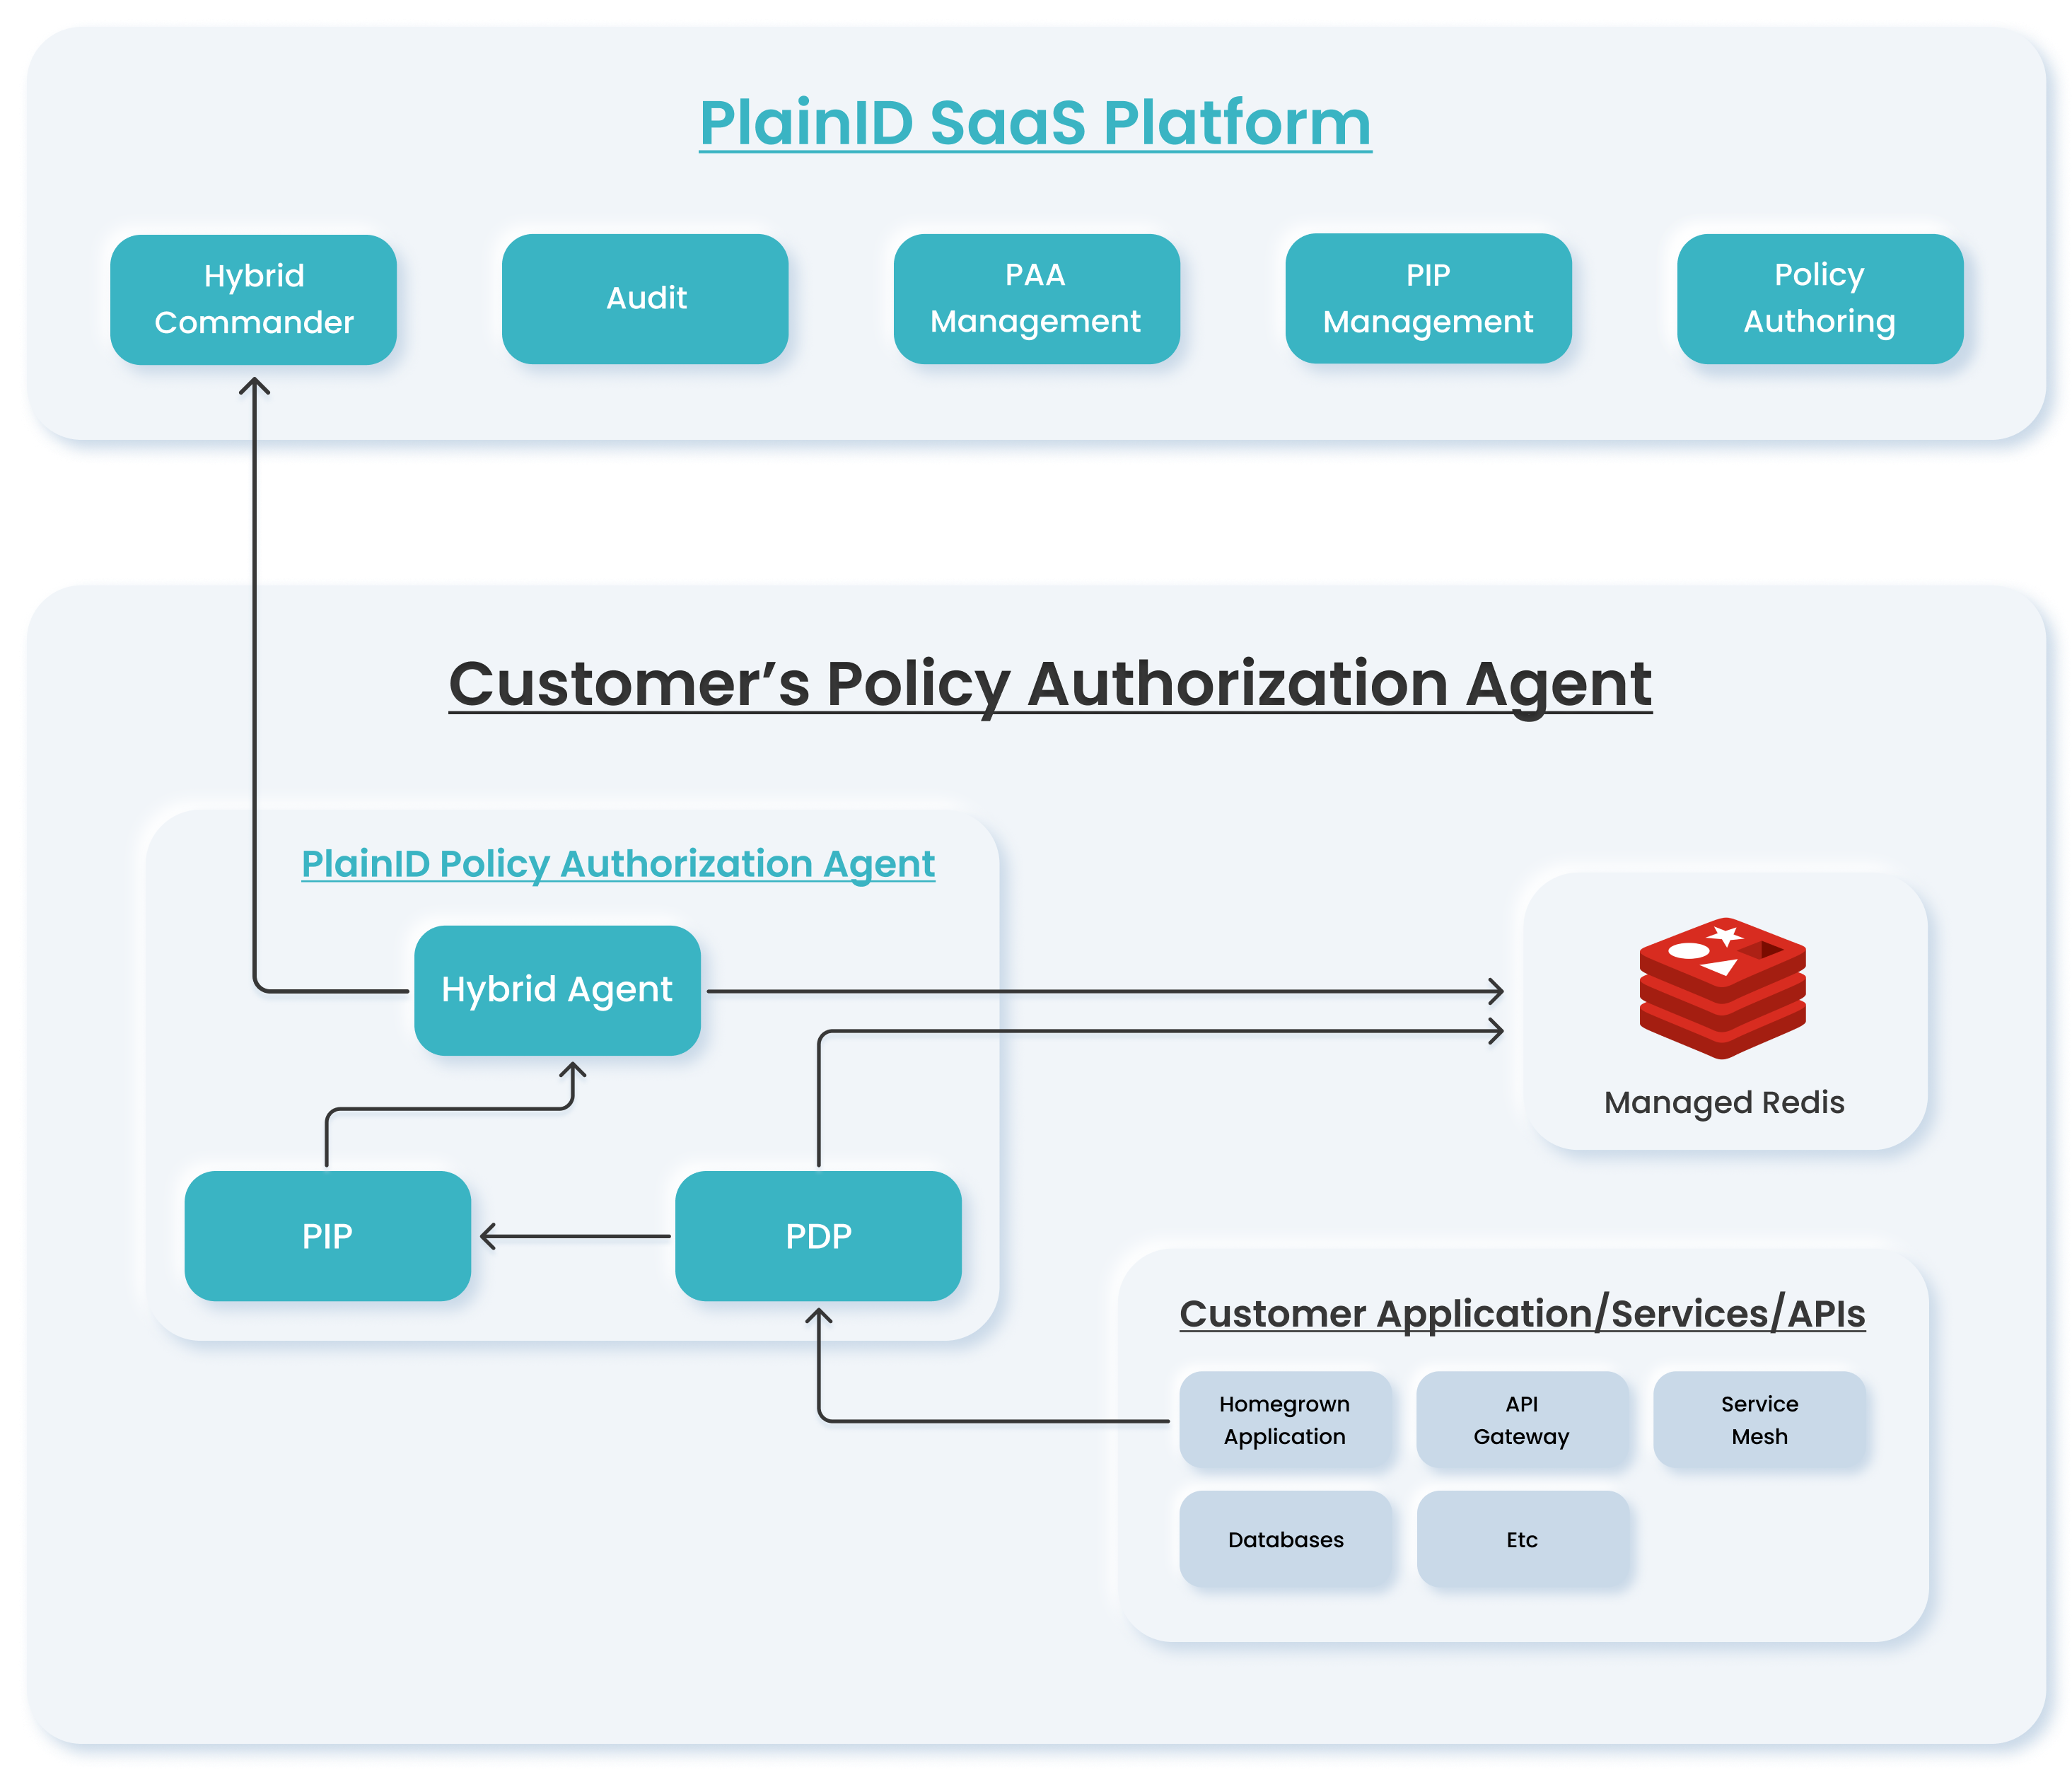
In this scenario, the decision making workflow can involve (for example):
-
An Application requesting an authorization decision from the local PDP.
-
If Identity information is required, the PDP contacts the local PIP to retrieve Identity data from the local data sources.
-
The PIP data is returned to the PDP, which sends the decision back to the Application.
All communication is managed locally, increasing performance and security, protecting sensitive information, and decreasing latency.
Supported Architectures
The PAA can work in a customer-hosted environment through the use of the following tools:
- Kubernetes-based deployment (standard Helm Chart)
- Standalone (Binary/Service)
Policy Authorization Agent Cards
- Tenant PAAs are listed in the Tenant Settings > Policy Authorization Tab > Policy Authorization Agent List.
- Environment PAAs are listed in the Environment Settings > Policy Authorization Tab > Policy Authorization Agent List.
The first PAA card that appears on the Policy Authorization Agent tab is the built-in PAA that contains a PDP component (Cloud-based Authorization Platform with all components hosted in the Cloud). Additional PAAs appear in alphabetical order, each containing the following information:
- PAA Name
- PIP icon, which is visible when the PAA is connected to one or more PIPs. If no PIPs have been connected to this PAA, the PIP icon is not displayed.
- PDP icon indicates that a PDP has been connected to the PAA.
- Download button enables you to download an installation bundle for the PAA. Bundle options include: Helm and Standalone.
When you click on a PAA card, the Policy Authorization Agent Details for that card is displayed. This shows the currently defined name of the PAA and the Agent ID. You can click Copy to copy the Agent ID to the clipboard. This value is also needed to define the connection between the Hybrid Operator and the Hybrid Commander.
Once you have created the PAA and downloaded and installed the configuration files, you can configure a Policy Information Point for the PAA. For more information, see Data Sources.**
## End-to-End Workflow
An end-to-end workflow of configuring a Policy Authorization Agent to manage communication and authorization decisions locally would include:
- Creating a PAA
- Downloading the PAA bundle
- Installing and configuring the PAA
- Defining a Data Source
- Defining a View for the Data Source
- Assigning the PAA to an Environment and/or Scopes
- Creating a new Asset Type
- Associating the Asset Type Attributes
To learn more about installing and deploying PAAs, click here.