You can manage local PAAs in the Platform. This includes adding, installing, editing, viewing, and deleting PAAs. To configure a PAA, you will need information from the Tenant Setting screen including:
- Tenant ID
- Authentication key
- Agent ID
To find these values, select the Hybrid Agent Key settings tab and copy these values. This information is used to configure and set up communication between the PAA (Hybrid Operator), and the Platform (Hybrid Commander).
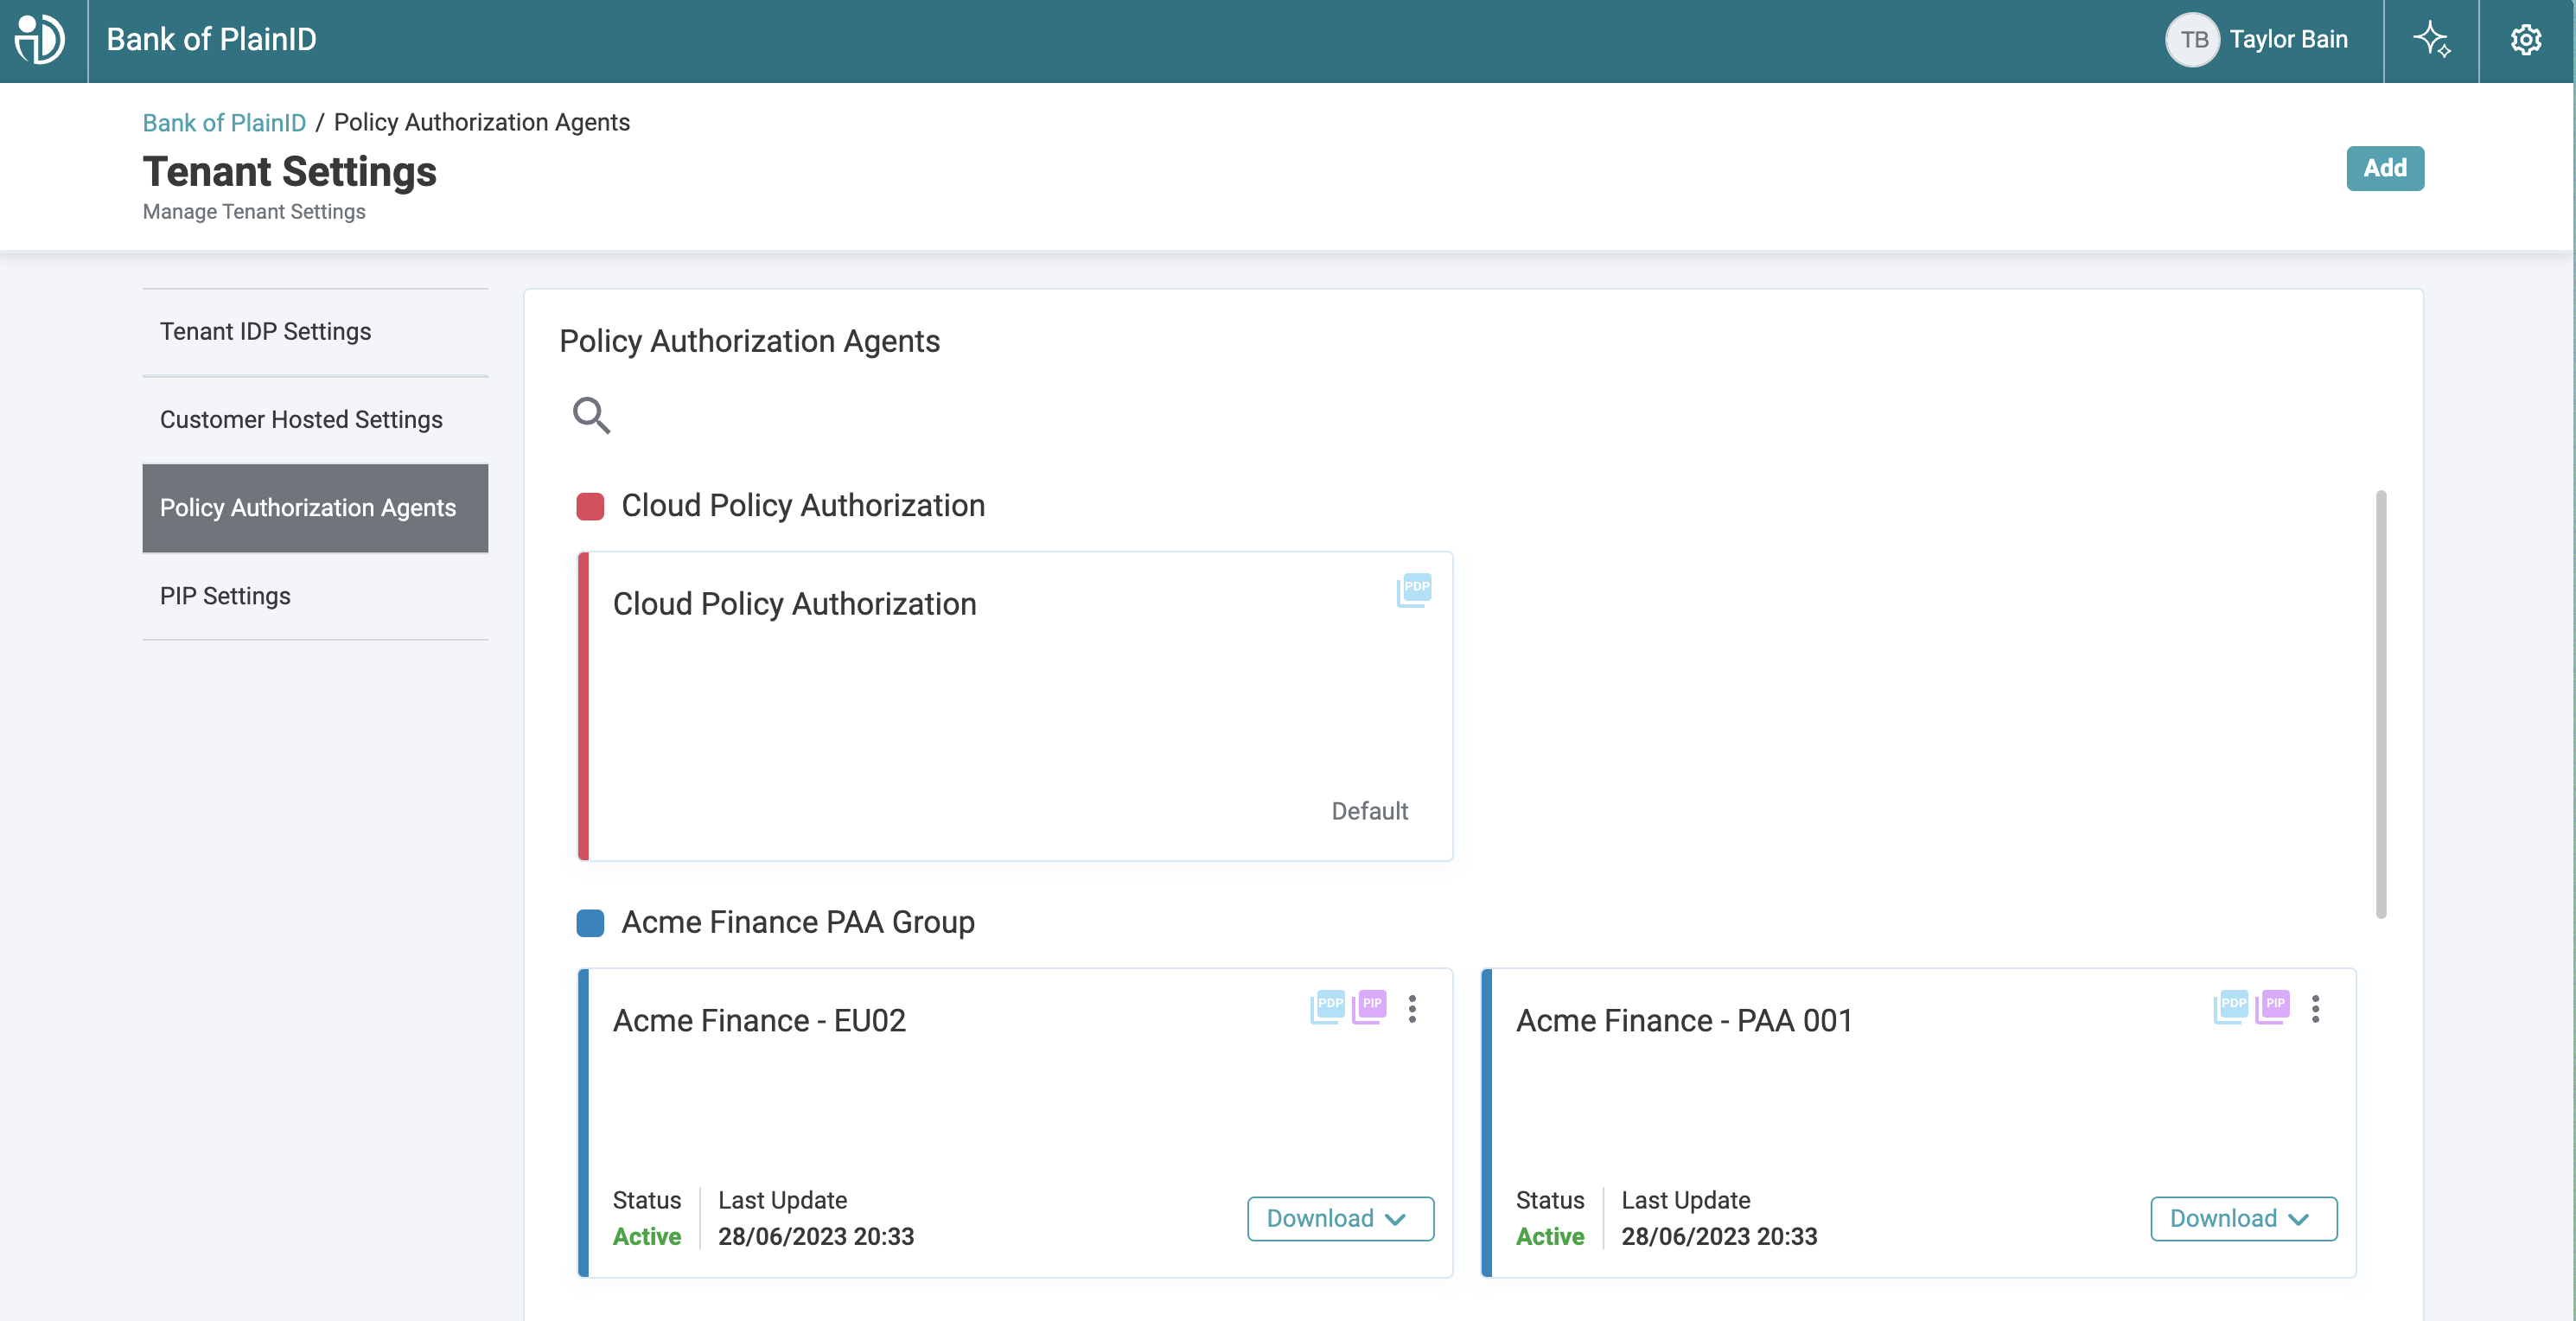
- Tenant PAAs are listed in the Tenant Settings > Policy Authorization Tab > Policy Authorization Agent List.
- Environment PAAs are listed in the Environment Settings > Policy Authorization Tab > Policy Authorization Agent List.
Adding a New PAA
To add a PAA:
- On the Tenant Settings screen, select the Policy Authorization Agents tab. The Policy Authorization Agents screen is displayed.
- Click Add. The Policy Authorization Agent Details screen is displayed.
- Enter a Name for the new Agent.
- Select an existing PAA Group or create a new one by:
- Entering the name for the new PAA Group
- Click Add Value.
- In the Incoming JWT Validation Settings field, enter the relevant JWKS URLS. This defines the settings for validating the incoming JWT.
- Click Save. The new PAA is created and added to the list of currently defined PAAs on the Policy Authorization Agents tab .
Installing a PAA
Download bundles are available on the Policy Authorization Agent screen in either the Tenant Settings or Environment Settings Policy Authorization Agents option. For assistance in installing and configuring a PAA, contact the PlainID Technical Support Team.
Viewing Policy Authorization Agent Details
At any time, you can view details of a PAA by clicking on the PAA Card in the Policy Authorization Agents option (from either the Tenant Settings or the Environment Settings screen).
To view PAA Details:
- Click on a PAA. The Policy Authorization Agent Details side panel opens. In addition to details of the PAA, you also have options to:
Click Copy to copy the Agent ID number.
Click Save if you changed the PAA name.
Changing the Name of a PAA
You can change the name of the PAA as it appears on the Policy Authorization Agents tab.
To change the name of a PAA:
- Open the Tenant Settings screen and click on the PAA you wish to rename. The Policy Authorization Agent Details screen is displayed.
- In the Name field, enter the new name.
- Click Save.
Deleting a PAA
You can delete a PAA within a PAA Group that is no longer needed.
To delete a PAA:
- Open the Tenant Settings screen and locate the PAA you wish to delete.
- In the upper right area of the PAA card, click the three vertical black dots and select Delete PAA.
- A confirmation message appears, asking you to confirm that you want to delete the PAA. Click Delete. The PAA is deleted permanently.
Deleting a PAA that is currently associated with Assets and Environments is not possible. If you attempt to delete a PAA that is the last one within its group and is still being used in Asset Types and/or Identity Sources, an error message is displayed.
The error message provides information about the specific locations where the PAA is being used. Make sure to delete the relevant Identity Attribute sources and Asset Types listed in the error message before trying to delete the PAA again.
PAA Group Workflow
When operating with a single, hosted Policy Authorization Agent within the Authorization Platform, by default, the Cloud Policy Authorization PAA will be used.
Because many organizations operate in multiple regions across different networks, it is common for them to create local repositories (databases, user directories, etc.) to improve performance as well as for security reasons.
The Platform's PAA grouping capabilities enable organizations to work across multiple regions and networks.
In the Platform, a single set of Data Models and Views are created for a new PAA. Multiple Policy Administration Agents (PAAs) located in various regions can then share the same:
- Data Source
- Data Model
- Data Model properties
- Views
- Asset Attribute associations
within a PAA Group. In this scenario, the only difference between the PAA Group members is the connection string (which includes the credentials, PI/Server name, Ports, etc.).
The workflow for creating and working in a multi-region configuration includes the following:
- Create a new PAA, for example, WH-PAA.
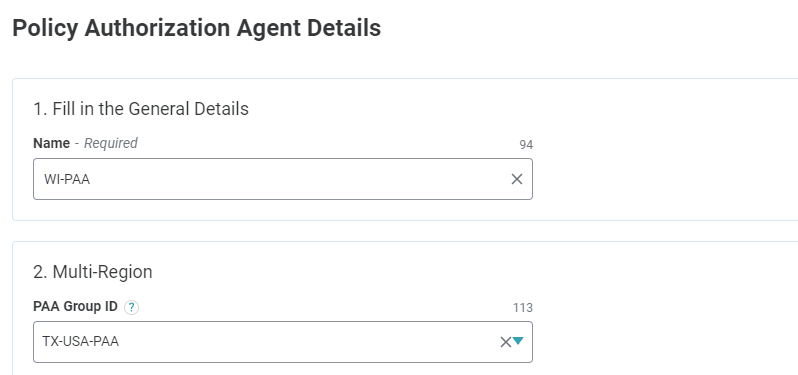
- If you are creating a single PAA, you do not need to enter any name in the PAA Group ID field. When you click Create to add the new PAA, the Platform will automatically creates a new PAA Group with the same name. In the future, if you wish to add a PAA with a similar configuration, you can add that PAA to this PAA Group (which currently only contains the PAA you just created).
- Each time you create a new PAA, you have the option to select in which PAA Group you wish to include the PAA, thus creating a PAA Group with multiple PAAs in it.
*To learn more about installing and deploying PAAs, click here.